Last updated on
Explore innovative garage design ideas that transform this often-overlooked space into a functional and aesthetically pleasing area of your home.
Revamping your garage into a functional and aesthetically pleasing space can add significant value to your home. Whether you’re looking to transform it into a workshop, a home gym, or a secondary living area, there’s a myriad of design ideas to explore.
We’ve consulted with Industry Standard Design to delve into various garage design ideas, detailing the pros, cons, and practical aspects of each. From storage solutions and flooring options to lighting and color schemes, we’ve got you covered.
So, if you’re ready to give your garage a much-needed makeover, read on to discover a plethora of design inspiration.
Implementing Compact Storage Systems
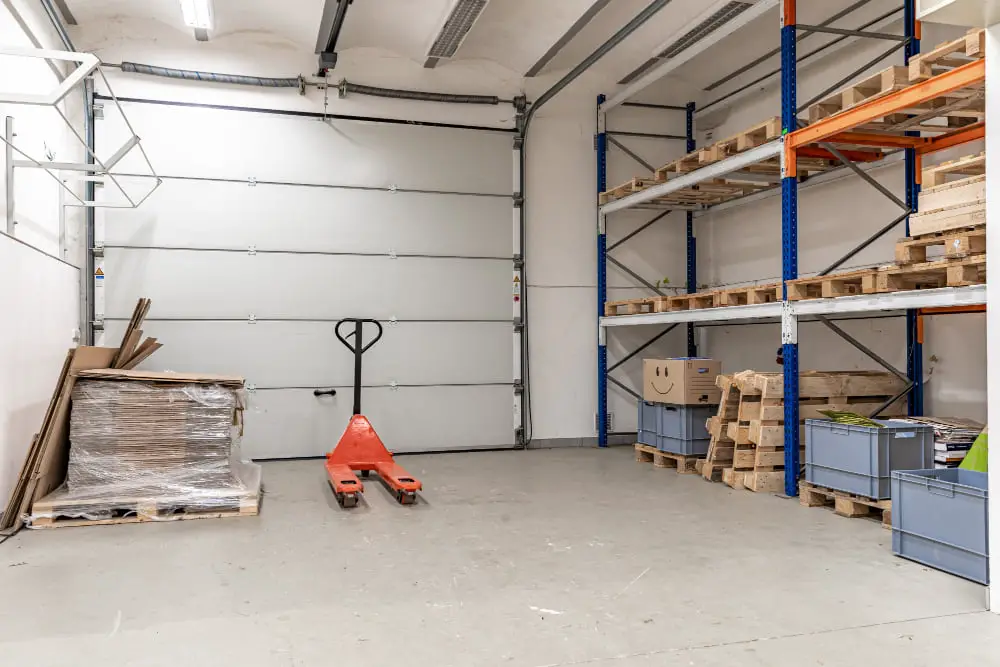
Implementing compact storage systems is an efficient way to utilize every possible inch of your garage space. Start with corner shelving units, which can make use of often overlooked spaces. They are ideal for storing small tools, automotive fluids, or garden supplies.
Freestanding cabinets are also viable options. Depending on their size and design, they can store items of various sizes, from small hand tools to larger equipment such as lawnmowers or space heaters. Make sure to choose cabinets with doors to keep everything tidy and conceal clutter.
For storing long, flat items such as ladders or pieces of lumber, overhead racks are a savvy solution. Installed on the ceiling, these racks provide a safe, out-of-the-way storage option, freeing up much-needed floor space.
A clever alternative for smaller items is a pegboard wall. Not only does a pegboard wall allow for easy access to frequently used tools, but it also keeps your work area clutter-free.
Lastly, don’t forget about the space right under your feet. Floor cabinets, benches with built-in storage, or even in-floor compartments can be effective ways to add more storage without encroaching on the workspace.
Installing Adjustable Wall Shelving

To maximize the flexibility and utility of your garage, adjustable wall shelving is a fantastic solution. Its chief benefit lies in its adaptability; as your storage needs evolve, so too can your shelving configuration. For items of varying sizes, having the ability to modify shelf height is a significant advantage.
Here are key points to keep in mind when installing such shelving:
- Measure space precisely, considering the size of items likely to be stored.
- Use sturdy materials that can withstand weight of stored items.
- Install sturdy brackets to support the weight of the shelf and the items on it.
- Space shelves in a way that allows easy access to stored items.
- Ensure strong wall anchoring; consider weight limits.
- Make use of vertical space but remember to keep frequently used items at arm’s reach.
- Protect shelves from damage with paint or finish.
- Equipment needed would probably include measuring tape, a level, a drill, screws, and anchors.
- For heavy loads, consult professional guidance or consider hiring an expert for installation.
With adjustable wall shelving in place, your garage will be better organized and easily adaptable to your evolving needs. It could just turn out to be the most versatile area in your home.
Including a Workbench or Craft Area

Spaciousness is a key component when considering a workbench or craft area in your garage. Three main considerations prevail: Bench size, organization, and accessories.
First, ensure the bench or table is substantial enough for intended activities. Perhaps, the hobby is assembling models, requiring a smaller bench compared to woodworking, demanding a larger surface. Allotting appropriate space from the beginning curtails future complications.
Secondly, an organized garage brings joy to any hobbyist. In this context, arranging tools and materials systematically becomes crucial. Drawers under the bench, magnetic strips for holding small tools, and vertically-hanging solutions for larger ones can be of great help.
Lastly, tailored accessories can morph an ordinary bench into a hobbyist’s utopia. A mounted vise is a godsend for anyone working with their hands, as are lighting fixtures, like flexible desk lamps, which offer precise illumination on detailed tasks. Think about the specific requirements of your hobby and add accessories accordingly.
Careful planning and clever organization make for a successful implementation of a workbench or craft area in a garage, fusing functionality and enjoyable working conditions into a singular environment.
Adding a Mudroom Section
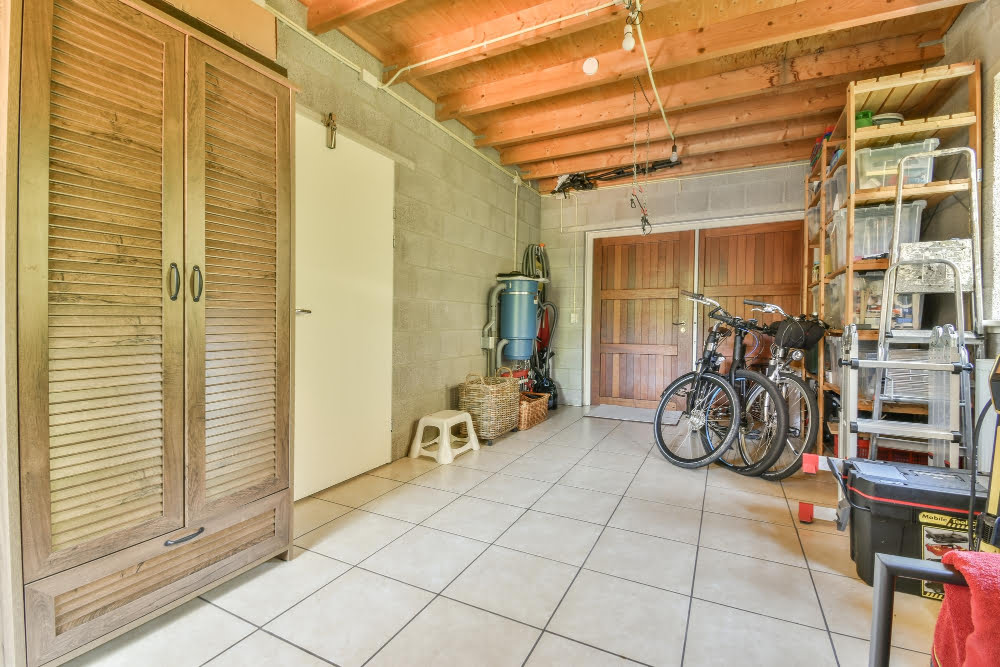
A mudroom section provides an organized space for shoes, coats, and outdoor gear. Located at the garage entrance, it acts as a transitional area, keeping dirt and clutter from entering the home.
To establish a mudroom:
- Determine the size and design depending upon your family’s needs.
- Install a sturdy bench for easy shoe donning and removal. Underneath, create space for shoe storage.
- Set up hooks or hangers for coats and bags. Higher hooks for adults, lower ones for children.
- Add separate baskets or bins for each family member to store personal items like hats, mittens, or scarves. Labels can help maintain organization.
- To catch mud and dirt, place an easy-to-clean mat at the entrance.
- If space allows, a closed cabinet can be used for additional storage or to hide unsightly items.
This functional area not only enhances garage aesthetics but also doubles as a practical solution for managing everyday items.
Using Ceiling-mounted Storage Racks
With the garage’s vertical space often overlooked, ceiling-mounted storage racks bring a much-needed addition for keeping items off the ground and efficiently utilizing all available storage areas. Sturdy and available in a variety of sizes, these racks balance the weight evenly around the ceiling attachment points to safely store large items.
Installing these racks takes a few simple steps. Initially, assess the garage’s structure. Ensure the ceiling can support the weight you aim to store.
Choose racks with adjustable heights, to cater to the size of the items you plan to put away.
To make the best out of this installation, place the racks above garage doors or over parked cars, places that are typically underused.
If DIY is not your style, there are professionals who specialize in installing these storage solutions. This service often includes free consultation to optimize your garage layout.
Coupled with proper usage, these ceiling-mounted storage racks can come in quite handy. For instance, store seasonal items or infrequently used bulky equipment like kayaks, surfboards, or camping gear overhead. Doing so not only maximizes space but also ensures easy retrieval when needed.
Remember to clearly label all containers before storing them overhead, to avoid unnecessary hunting for items when needed later.
Overall, incorporating ceiling-mounted storage racks in your garage is an innovative and practical way to maximize space efficiency.
Painting Garage Floor With Epoxy
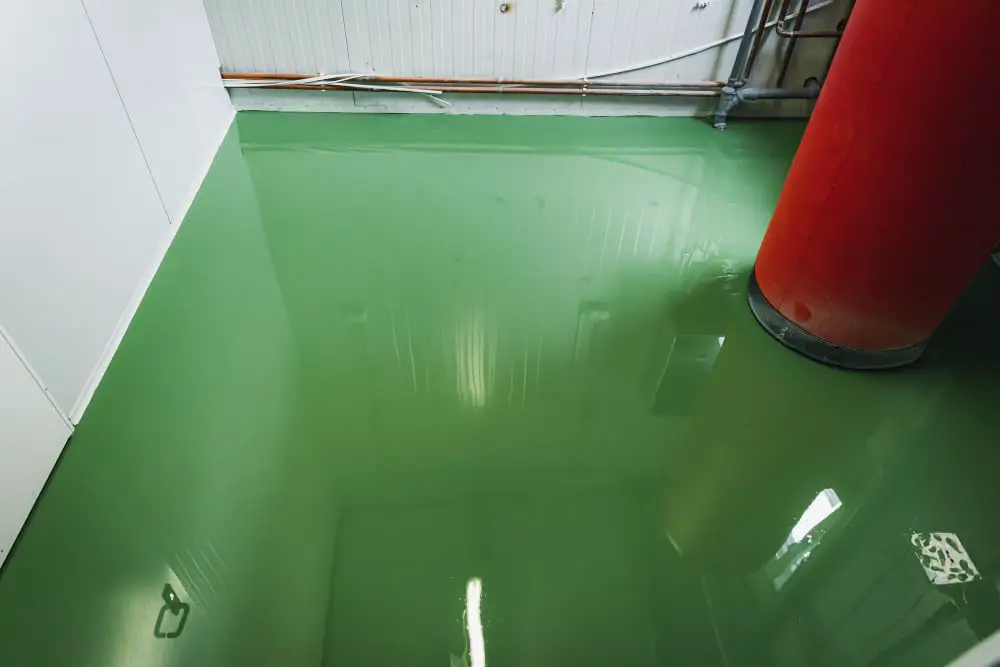
Epoxy is a robust and lovely garage floor paint that is resistant to oil stains and wipes clean like a kitchen counter. Color chips and custom paint colors hide inconvenient stains and dirt, while commercial-grade epoxy resurfaces the floor to fill minor imperfections.
When applying epoxy, there are several key steps to follow:
First, choose the right moment. Epoxy should be applied when temperatures are between 60 and 90 degrees Fahrenheit. Dampness can damage it, so it should not be used if heavy rains or high humidity are forecasted within the next three days. Fall or spring typically provides the best conditions for application.
Clean the floor thoroughly. It needs to be free of all dust, dirt, and oil stains for the epoxy to adhere properly. Use a broom and vacuum for initial cleaning, followed by a degreaser for oil spots, and finish off with a power washer.
Choose an epoxy product intended for floors. This might be a one-part epoxy paint or a two-part epoxy coating kit. Make sure to follow the product-specific instructions.
Apply the epoxy, following manufacturer instructions carefully. Most applications involve spreading the epoxy with a roller, starting at the back of the garage so you can work towards the exit. Allow the epoxy to cure per instructions, usually 24 hours, before putting anything on the floor or walking on it.
Decorative chips or quartz can be added if desired. These should be sprinkled onto the wet epoxy and a clear sealant applied over the top after the epoxy has dried.
Finally, ventilation is very important as epoxy fumes can be potent. Therefore, remember to open all doors and windows or use a fan if necessary.
Setting Up a Home Gym Area

Having a home gym in your garage can be a game changer for your fitness routine, saving both time and money on gym memberships. Here are some considerations and steps to get you started:
Define a clear space for your gym, separate from any other garage functions. This may involve moving some items or using dividers.
Ensure adequate ventilation for your workouts. This may be as simple as keeping the garage door open during workouts, or installing fans or other ventilation.
Invest in a few key pieces of equipment based on your fitness goals. An all-in-one home gym machine can offer versatility, but free weights or resistance bands can also serve as a great starting point.
For cardio, an exercise bike or a treadmill could be beneficial but do consider the available space.
Install mirrors on the walls. This not only opens up the space visually, but is also great for checking form and posture during workouts.
Consider hard-wearing, slip-resistant flooring to ensure safety. Rubber mats or similar products would be perfect.
Ensure good lighting in your workout space. It’s crucial for maintaining energy levels and a safe exercise environment.
Lastly, set up a small area for post-workout relaxation with a chair or yoga mat, plus a cooler for water and recovery drinks.
Remember – your garage-turned-gym doesn’t need to mirror a professional setup; it only needs to be a functional and enjoyable space that suits your fitness needs.
Designing a Car Maintenance Section

A section dedicated to car maintenance can transform the garage into a mini auto shop, bringing three main benefits.
Firstly, you will save cost and time on routine car maintenance tasks, as going to an auto shop is not always necessary. Conduct common procedures at home like oil changes, tyre rotations, and regular inspections to assure that your vehicle stays in top shape.
Secondly, by creating a dedicated space, the garage remains organised and tools are always easily accessible. A set of cabinets or a tool chest, a movable car lift, protective floor mats, and good lighting can be essential elements of this section.
Lastly, being engaged in car care evokes a sense of satisfaction, as you become familiar with your vehicle and its nuances.
For maximum efficiency, keep the car maintenance section close to the garage door for easy access and better ventilation. To take it a step further, consider installing a mini compressor for inflating tyres, a drill press, or even a parts washer.
Remember, while creating your DIY car care spot, safety is paramount. Store car fluids and potential hazardous materials out of reach from children and pets. Equipping the area with a first aid kit is also a smart move.
With these considerations in mind, the possibilities are endless when it comes to designing the perfect car maintenance section within a garage.
Installing Efficient Lighting for Better Visibility

Optimal illumination drastically enhances comfort and efficiency in a garage space. To ensure your lighting solution ticks all the right boxes, consider different types of lights for varied tasks.
Start with overhead lights. Use ample high-lumen output bulbs that illuminate the overall garage. LED shop lights are an excellent choice for the role, due to their longevity and energy-efficient attributes.
Task lights provide focused illumination for specified works, such as a workbench area. Consider adjustable, swing-arm lamps, they can adapt to the tasks at hand.
Furthermore, remember to shed some light on dark corners and closets with small, puck lights or adhesive LED strips. They are perfect for tight spaces and easy to install, just peel, stick, and illuminate.
Safety first, in a moist prone area like a garage, ensure all light fixtures are moisture-resistant. Moreover, opt for lights with a higher color rendering index (CRI) for more accurate color visibility in your workspace.
Lastly, look into motion sensor lights for an easy, hands-free approach, particularly in high-traffic areas of your garage. It saves energy and adds a layer of convenience.
Installing efficient garage lighting demands careful planning. Be mindful of your needs and tasks to select the appropriate lighting solution that best catifies them. Remember, the goal is to make your garage a brighter, safer, and more functional space.
Incorporating a Dedicated Space for Tools

Keeping your tools in order eliminates time wasted searching; moreover, it prolongs their lifespan by preventing damage. To establish a dedicated tool area, look into different storage options that align with the type, size, and quantity of tools you possess. Here are key ideas on how to achieve an effective tool organization system.
Consider pegboards. They allow for easy access, feature flexible arrangements, and provide visual inventory.
Drawer units or tool chests are also ideal. They offer protection, are stackable, and can secure valuable equipment.
Tool carts can be easily moved around. This is especially beneficial for large garages or projects requiring mobility.
Utilize plastic bins for smaller tools and accessories. Label each container for seamless retrieval.
Opt for magnetic bars to hang metallic tools. It provides easy access and displays your tools neatly.
Finally, hang a whiteboard or chalkboard nearby. This can serve as a reminder of borrowed tools, needed supplies, or maintenance schedules. This way, you have a comprehensive system to manage your tools, ensuring no hammer or screwdriver goes astray.
Utilizing Lockable Cabinets for Hazardous Materials
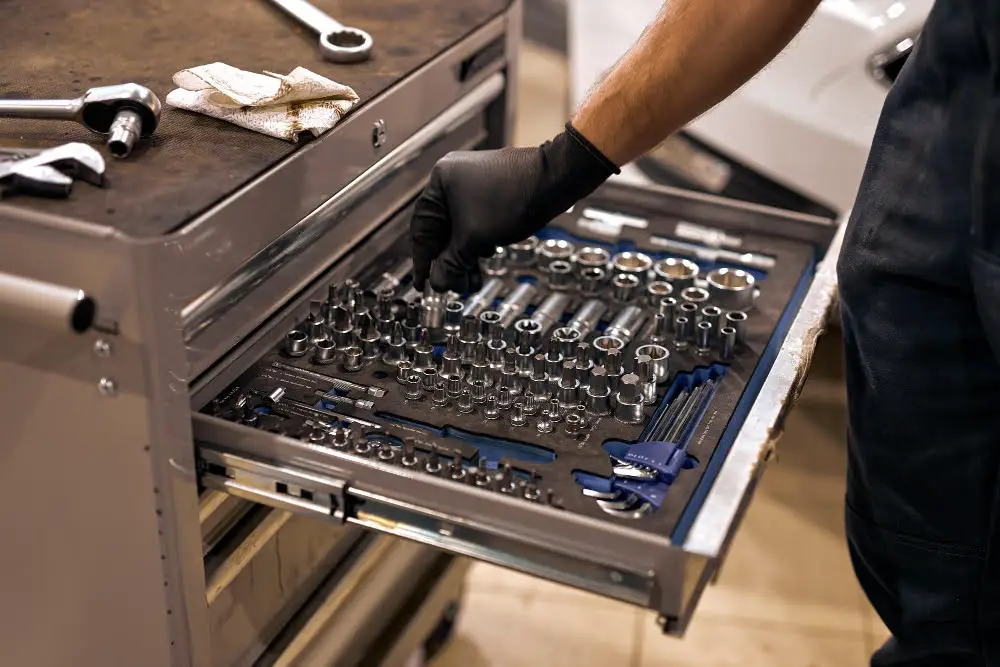
Incorporating a place for dangerous substances in the garage requires particular care. One practical and safe way to approach this is with lockable cabinets. Such cabinets provide a secure area that not only keeps hazardous materials out of reach, especially when there are children in the house, but also organizes them neatly.
– Select a cabinet with solid construction: Metal or high-density plastic are ideal materials, resistant to potential spills of harmful substances.
– Opt for cabinets with locking mechanisms: These prevent unintentional access to the potentially harmful contents.
– Keep in mind the size: Your cabinet should be adequately sized for your needs. Small items like paints, oils, or pesticides typically don’t require extensive space.
– Store flammables properly: Fire safety is critical. Look into cabinets specially designed for flammable items.
– Location is crucial: Place the cabinet in a cool, dry place out of direct sunlight.
– Regularly review what is stored: Expired or obsolete items should be disposed of in an environmentally friendly manner. Remember, safety first.
Lockable cabinets help to ensure a safer, more organized garage, proving their worth in any well-designed space.
Incorporating a Wall Track System for Hanging Items
Firstly, identify the items commonly used which can be hanged, such as gardening tools, brooms, or even bicycles. This will determine the types of hooks needed for your wall track system.
Consider the weight and size of these objects before selecting the corresponding tracks and hooks, ensuring sturdiness and longevity. For instance, heavy objects like bicycles would require robust and larger hooks, while smaller tools could benefit from simple S-hooks or J-hooks.
Proper spacing is also crucial when installing these wall track systems. Offering adequate space between each hook allows easier access and prevents items from cluttering together.
Next, choose your preferred wall track system based on the existing garage decor and preference. Two popular options include the direct mount, where the track is fixed directly onto the wall, and one that requires a hanging rail.
Lastly, always install your wall track system at a height easily accessible to all family members. Ensure the track is securely fastened into the wall studs for maximum security and to hold weight safely. This simple but effective storage solution can provide an easy reach to your daily essential tools, making your garage space more organized and efficient.
Displaying Sports Gear On Slat Walls

Slat walls are a fantastic way to keep sports gear in an accessible and organized fashion. They are installed directly onto your garage walls and accommodate a variety of hooks and baskets. Any kind of sports equipment, from balls to rackets and skates can neatly hang on these versatile panels.
To get set, first, decide on the wall you wish to install the slat wall. Ensure it has ample space for all your sports gear, preferably at chest height for easy access. Then, fix the panel onto the wall, using the appropriate screws and brackets.
Next, tackle arranging the gear by considering frequency of use. Arrange frequently used items like basketballs, tennis rackets at eye level and lesser-used objects towards the bottom or top of the slat wall.
After you’ve arranged everything, take a step back and check if you’re able to easily reach all items. Adjust positions if necessary, aiming for utmost convenience.
Special mention goes to seasonal gear, which should be swapped out as needed. When the winter season rolls in, switch out the summer equipment with skis, snowboards, or sleds.
Treatment of delicate gear is also crucial. Certain items such as fishing rods require special hooks that securely hold but do not damage the gear.
An added visual benefit can be achieved by grouping similar items together. This not only looks good but also provides an easy reference point.
Remember, the slat wall system’s beauty is its flexibility – as your needs change or grow, you can easily modify the setup to suit.
Installing Pegboards for Tool Storage
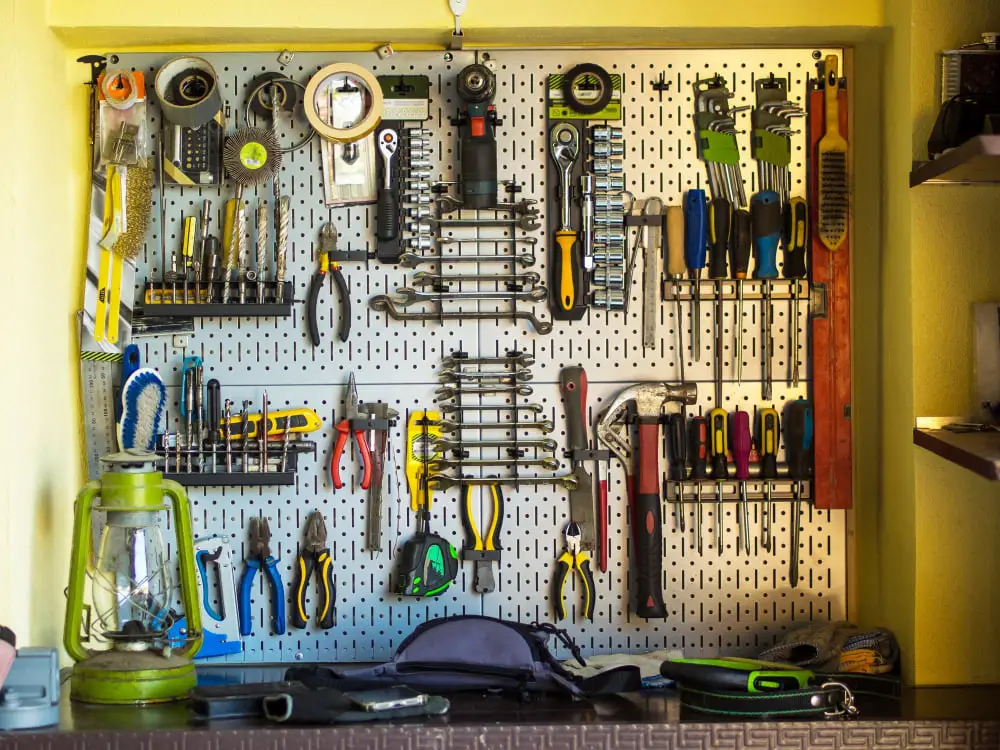
Pegboards present an ideal solution for organizing tools in a visibly accessible manner. Easily mounted on the wall, these perforated boards offer the flexibility to adjust the layout based on the tools you need to store.
First, choose an appropriate size and location for the pegboard. Accessibility and visibility should be the key considerations.
Ensure to install it properly, with enough space behind to accommodate the pegs. Some choose to frame the pegboard to increase stability, but this depends on individual needs and preference.
Next, sort out your tools. Group them by frequency of use, size, and purpose. It eases the process of allocating space on the pegboard.
Buy a variety of pegs and accessories suitable for holding different kinds of tools. Hooks, shelves, and bins are available, designed specifically for pegboards.
Once the setup is ready, you can start arranging your tools on the pegboard. Place frequently used tools at eye-level for easy access. Prioritize positioning based on functionality and convenience.
Label each tool’s spot to maintain order and facilitate tool return after use. This way, you prevent a chaotic tool mess and avert misplacement.
Maintaining a system is equally important as the setup. Regularly update the tool layout to cater to your evolving needs and maintain efficiency.
Designing a Car Washing Station

To first-time visitors, an in-garage car wash station might come off as a luxury, but for an avid car owner, this area serves as both a practical and cost-effective solution. It offers convenience and a chance to pay closer attention to the vehicle’s upkeep, allowing for a more thorough cleaning process while protecting the vehicle from potential environmental harm when washing outdoors.
Designing an effective car wash station entails several foundational elements:
- A designated space: Ensure enough room is allocated for manoeuvrability around the vehicle, and to store cleaning supplies within easy reach.
Waterproof flooring: Consider incorporating water-resistant flooring materials such as epoxy, which not only safeguards against water damage but also simplifies the cleaning process.
Drainage system: The installation of a proper drainage system is crucial to manage water runoff. Ensure it complies with local regulations related to water disposal.
Water source and hose: Opt for a retractable hose installed close to the water supply. It not only serves as a space-saving feature but also delivers high-pressure capabilities for effective cleaning.
Shelving for cleaning products: Keep your car cleaning products organized and readily accessible with a dedicated storage space. Try to use a rust-proof material to maintain durability and longevity.
Proper lighting: Use bright, energy-efficient lighting to help you spot any dirt or grime on your vehicle in all corners and crevices.
With these elements in your garage, the car washing process becomes simpler, more convenient, and efficient. You’ll save time and effort, all while ensuring your vehicle stays spotless.
Adding a Loft for Additional Storage

To successfully integrate a loft into your garage, consider the following ideas.
Firstly, assess the height and space available. Most standard garages can accommodate a loft, as you will typically need a minimum clearance of ten feet.
Secondly, decide on the loft’s main function. Is it purely for storage, or could it serve as a makeshift living area? The purpose of your loft will greatly influence its design.
Thirdly, consider access points, ideally a staircase or, in tighter spaces, a pull-down ladder. Ensure it’s sturdy and secure for safe access to the loft.
Fourthly, contemplate flooring options for your loft. Plywood is a functional and affordable choice for storage areas, while carpet or laminate may better suit living areas.
Finally, install appropriate lighting. This could involve fitting overhead lights or even popping in a couple of windows to let in natural light, provided the garage’s architecture allows for it.
After these considerations, consult with a professional contractor to carry out the work, ensuring safety and building code compliance.
Incorporating a Bike Rack
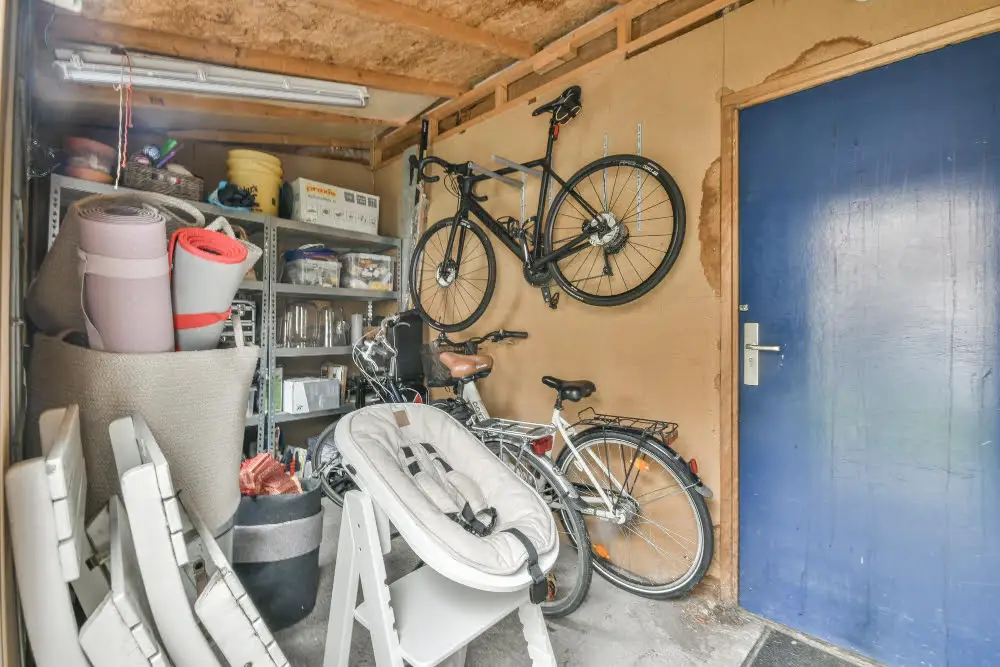
Bike racks can be a significant addition to any garage design. Here are a few key points to bear in mind while incorporating this feature:
- Consider the type of bike rack: From free-standing racks to wall-mounted options, choose a style that best suits the garage dimensions and the number of bikes to accommodate.
- Position it correctly: Ensure there’s ample space to take the bikes on and off the rack without disturbing the other areas in the garage.
- Make it accessible: Accessibility for all members of the household is imperative. It’s important the bikes are easily reachable and not a hassle to get to or store away.
- Determining needs: The choice of rack will heavily depend on the type of bikes and the available floor or wall space. Vertically hanging the bikes can save space in a tight garage.
- Installation: Many bike racks come with installation kits and a step-by-step instruction. Others may need professional assistance.
- Protection: Consider choosing a rack that holds the bikes off the ground, protecting them from water or any liquid spillage.
Remember, the aim is to maximize function and efficiency while maintaining an appealing aesthetic.
Setting Up a Dedicated Gardening Station
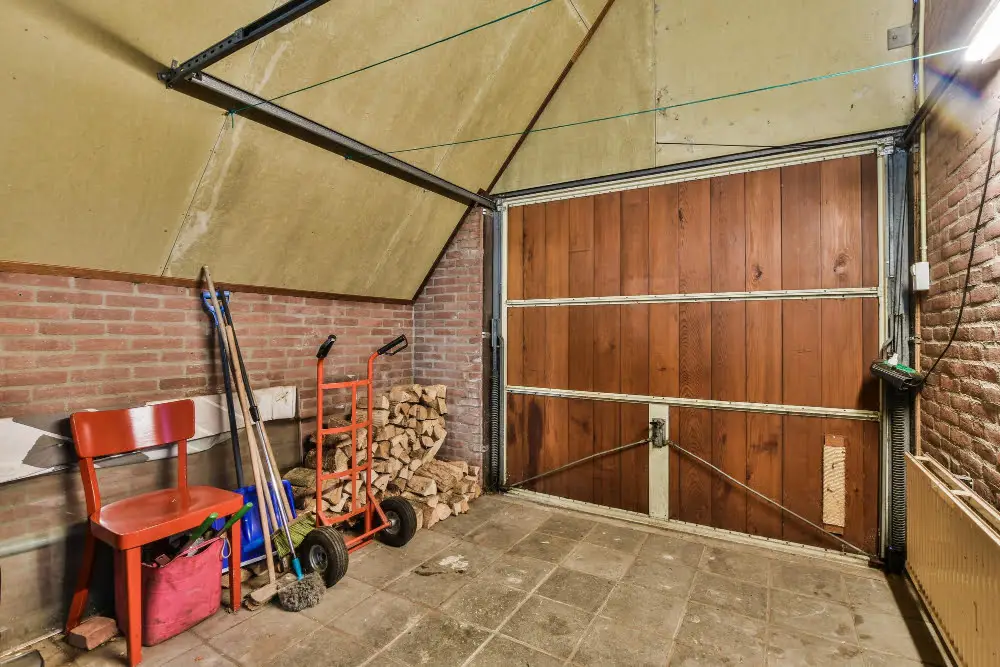
A gardener’s paradise within the garage begins with proper organization. Equip the station with an ample tool rack, specifically designed to hold shovels, rakes, and other gardening essentials. A storage cabinet can be exceptionally useful for bagged items like potting soil and fertilizer, keeping them dry and out of reach for pests.
Next, contemplate a potting bench for the station. It not only provides a place to work with plants, but also offers storage options underneath. Have different bins for potting mix, compost, sand, and vermiculite to allow for a personalized soil mix for each plant.
An interesting yet practical feature is the installation of a sink. A sink in the gardening station aids in clean-up, water accessibility, and even transplanting tasks. All needed water supply will be at arms reach, which simplifies many gardening chores hiterto considered daunting.
In terms of lighting, as natural light isn’t often abundant in garages, having bright, task-oriented lighting above the gardening station is indispensable. It aids in precise planting, potting, and tidying.
Lastly, proper climate control is crucial for seeds or tender plants. If you plan to start seeds or over-winter plants in your garage gardening station, a space heater or fan—as the season may demand, can make all the difference in plant health and growth. By following these guidelines, the creation of a dedicated gardening station is within reach.
Designing an Insulated Climate-controlled Area

Creating a thermally efficient zone in your garage can offer a multitude of benefits. To start with, proper insulation will keep the garage warm in winter and cool in summer, improving the efficiency of heating or cooling systems should you choose to install them. It can also cultivate a conducive environment for hobby activities or storage of temperature-sensitive items.
The addition of insulation starts with choosing the right type. Popular options include batts, foam boards, and reflective insulation, each with their own merits. Matching the insulation type to your garage’s specific needs and your budget is key.
Following that, seal any possible air leaks around doors and windows. Utilize weather stripping or caulk to stop drafts. This not only enhances insulation but also prevents pests and dust from infiltrating your space.
Implementing a climate control system is the finishing touch. Options range from portable heaters and fans to more elaborate HVAC systems. Your choice should reflect the intended use of the space, the size of your garage, and your budget.
Remember that implementing insulation and climate control will likely require making changes to the garage’s electrical system. It’s essential to have a professional evaluate and perform these electrical modifications to ensure safety and compliance with local building regulations.
One more thing to consider – if you are storing combustible materials, a climate-controlled environment needs to be appropriately ventilated. This can be achieved through the use of exhaust fans or ventilation ducts, helping to maintain an optimal air quality in your garage. Wall and ceiling vents are an effective way to naturally circulate air.


