Last updated on
Explore a myriad of innovative garage pegboard ideas to maximize storage and create an organized, efficient workspace.
I take immense pride in creating this article and unique designs about 20 Ingenious Garage Pegboard Ideas, and it’s my sincere hope that you find it as inspiring and fun as I did while crafting them.
Transforming a cluttered garage into a well-organized workspace can be achieved effortlessly with the ingenious use of pegboards. These versatile tools offer a multitude of garage pegboard ideas, from hanging tools and sporting equipment to creating craft stations or even a gardening center.
This article will delve into the myriad of ways you can utilize pegboards to maximize your garage space, keep items easily accessible, and maintain a tidy environment. Whether you’re a DIY enthusiast or just looking to declutter, you’ll find a wealth of detailed information on how to best implement this handy organizational solution.
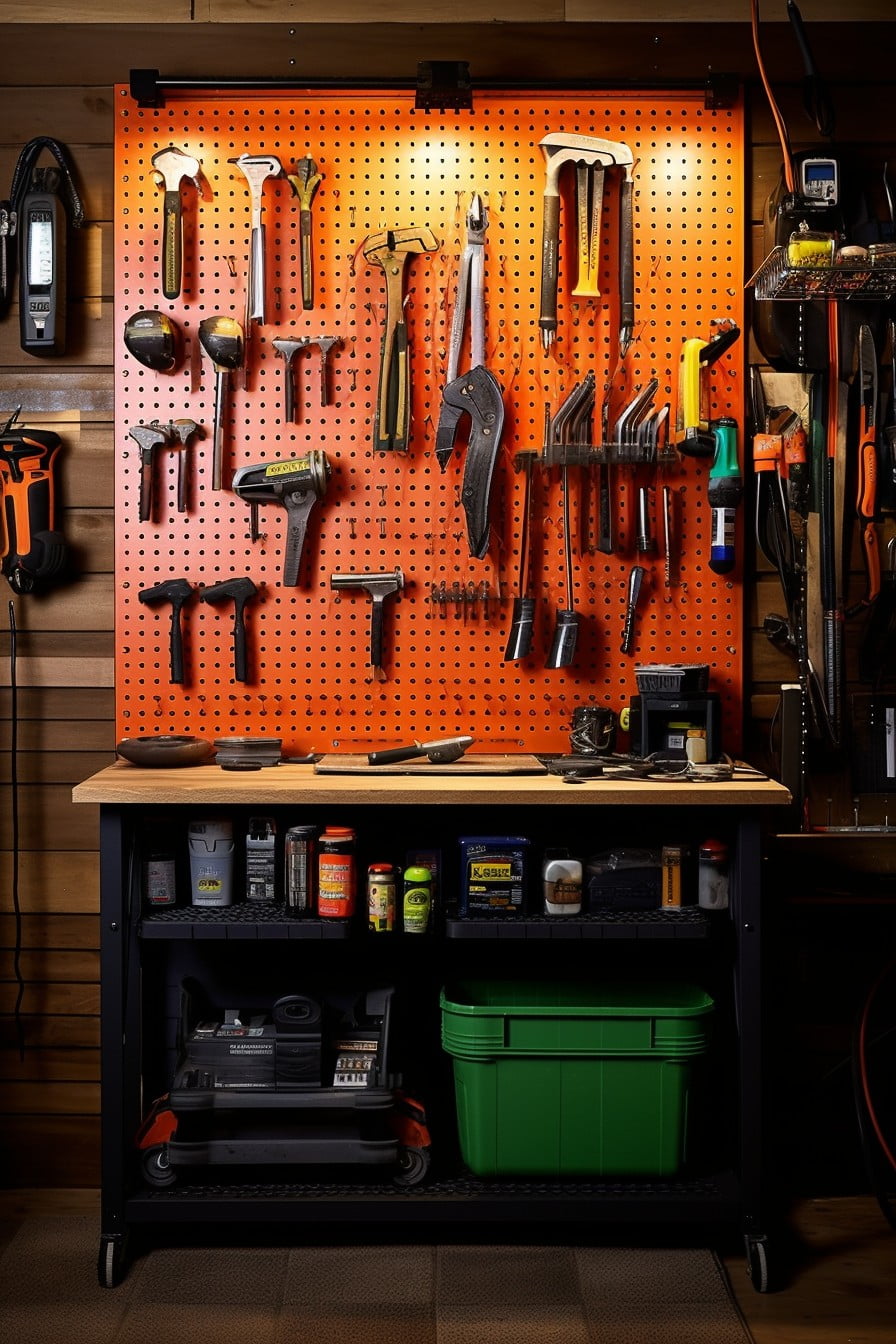
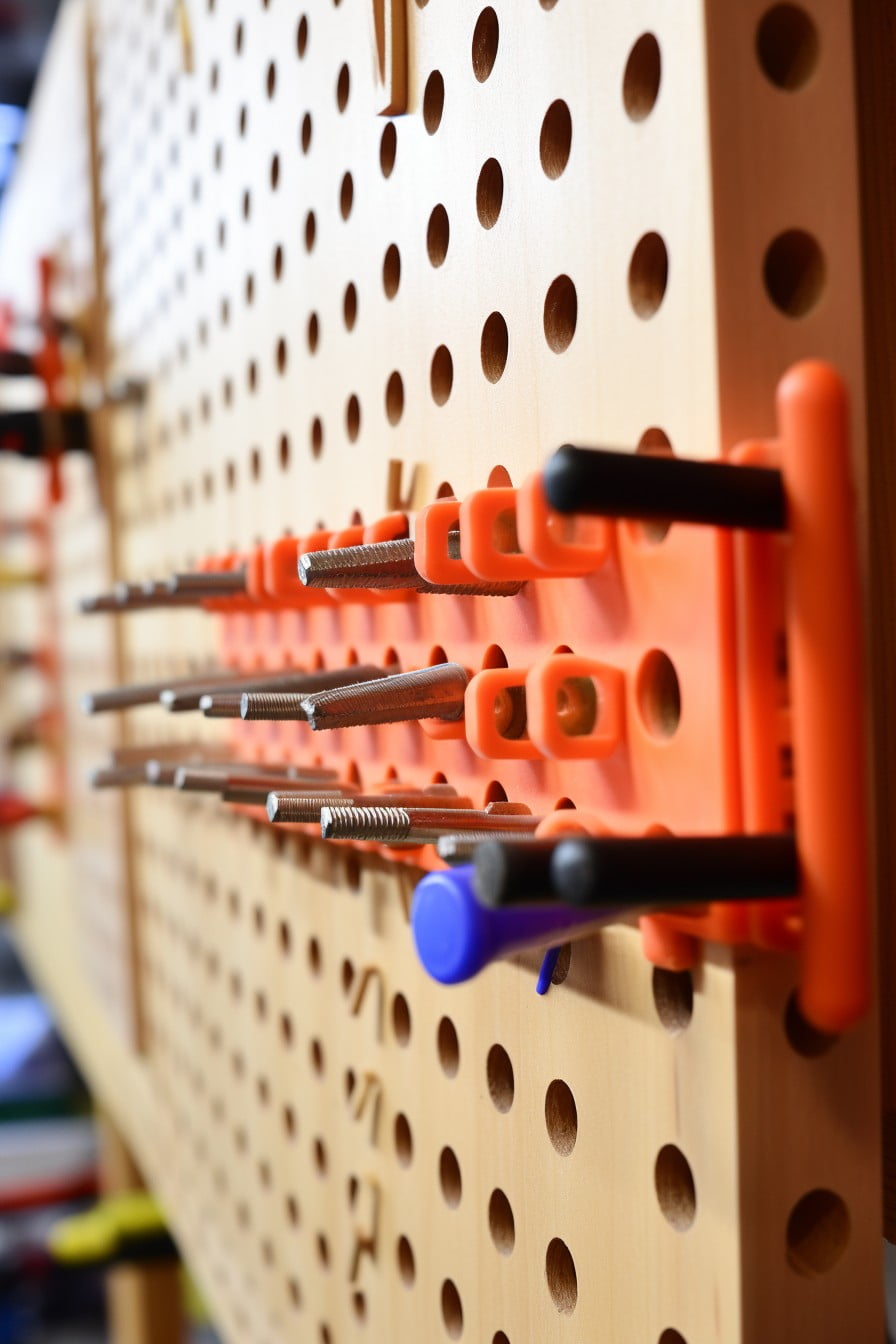
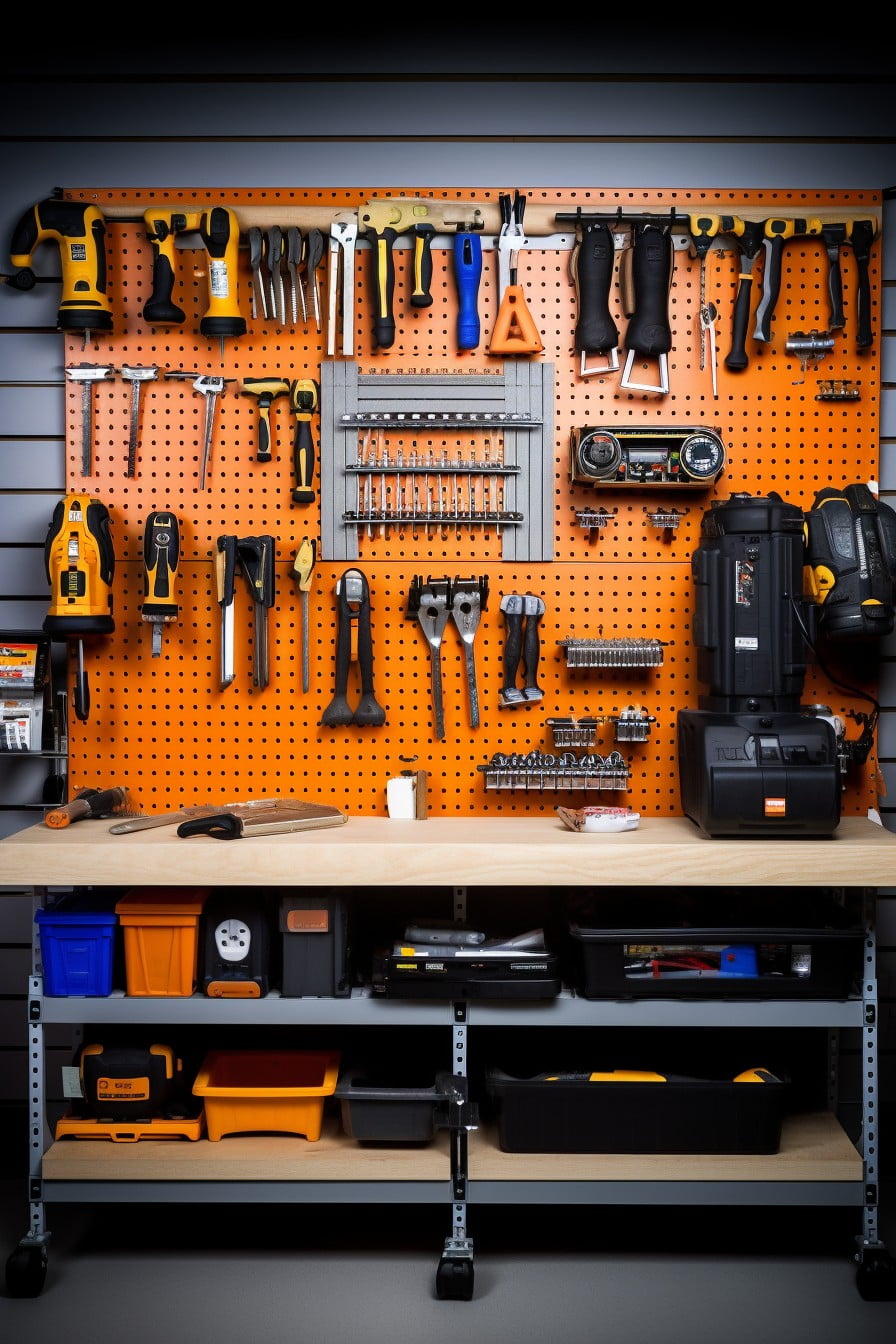
Power Tool Pegboard Display
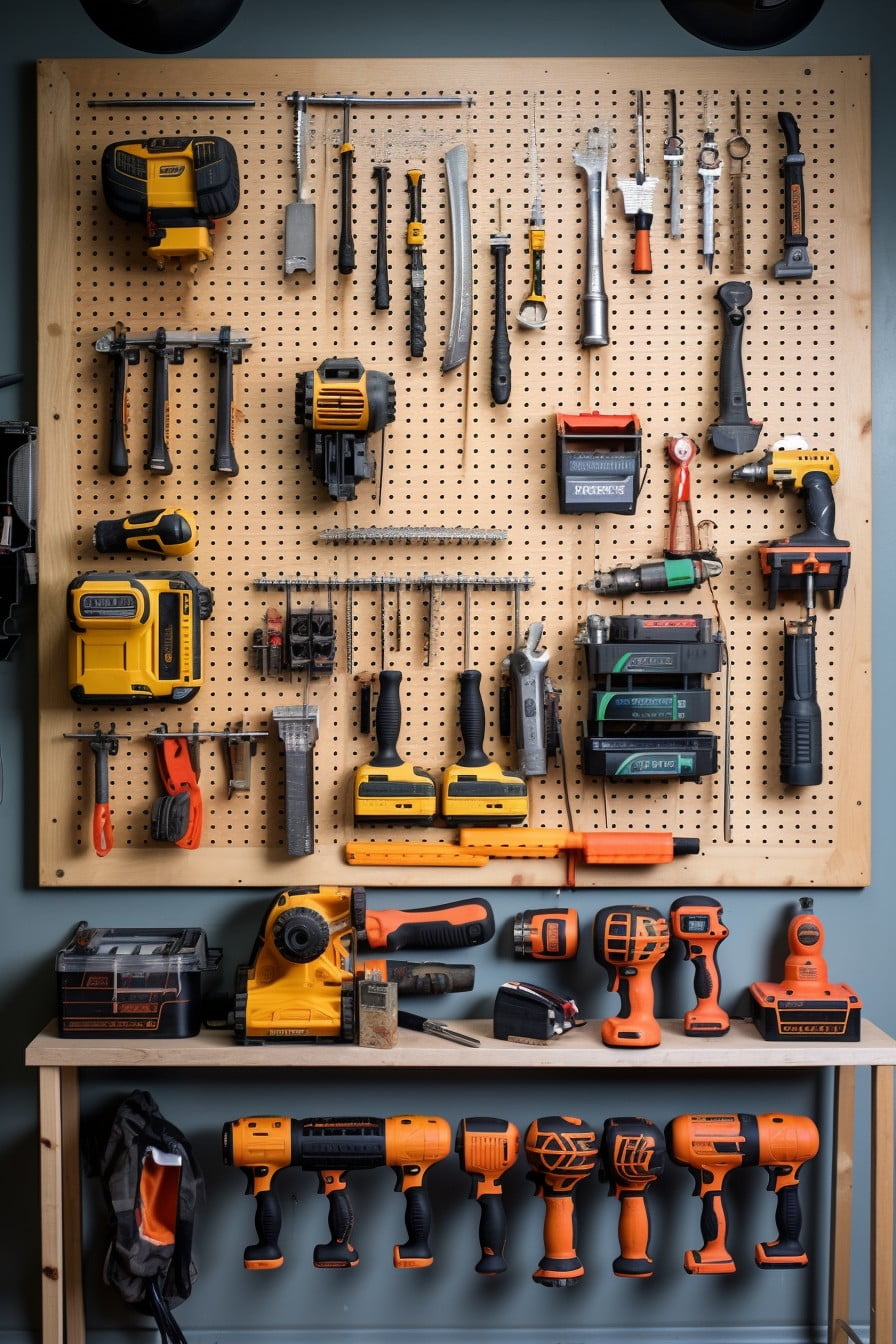
To effectively arrange a pegboard meant for power tools, consider these key points:
1. Keep frequently used tools at eye level: The likes of drills, saws, and sanders should be within easy grab-and-go reach to streamline efficiency.
2. Group related tools together: Nestling drill bits near drills and blades adjacent to saws militates against incessant searches.
3. Use strong hooks: Power tools are heavier than manual ones; thus sturdy hooks are crucial to prevent sagging and tool damage.
4. Leverage pegboard accessories: Take advantage of pegboard bins and clips to securely store smaller tool attachments.
5. Space out tools: Adequate space between tools prevents accidental scratches or damages during removal or replacement.
Thus, power tools, when appropriately displayed, contribute not only to garage organization but also enhance productivity and tool maintenance.
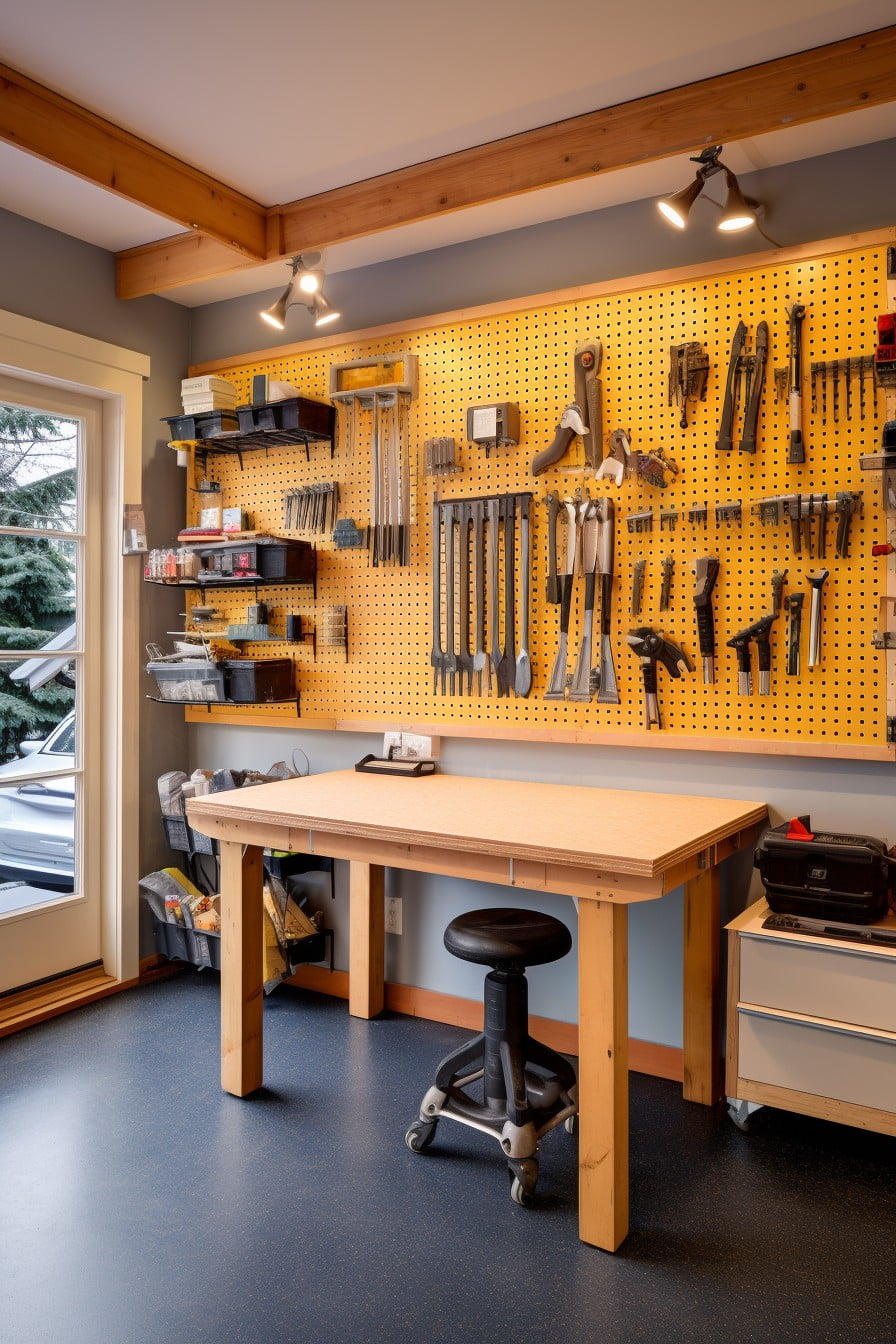
Workbench Pegboard With Attached Lighting
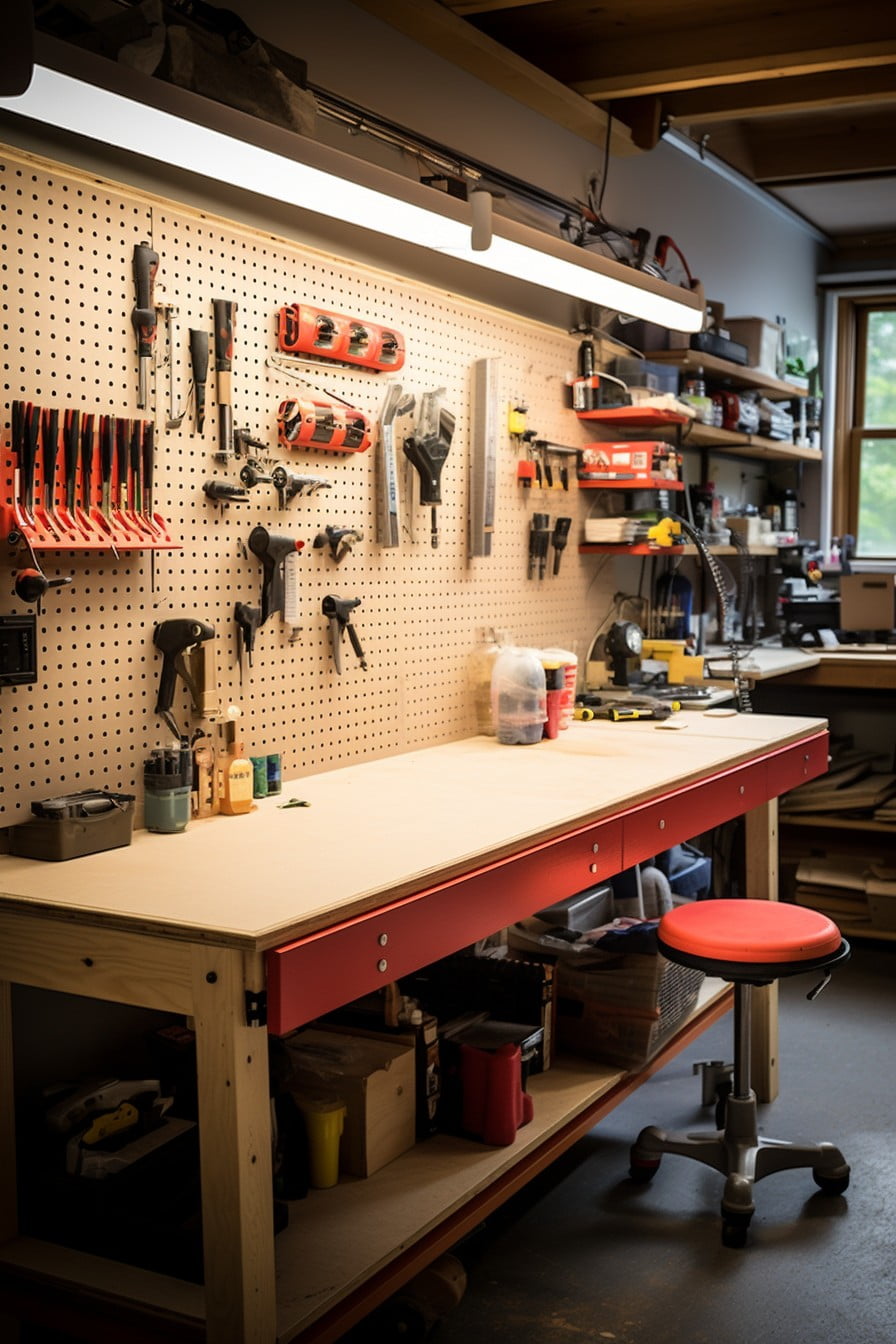
Implementing attached lighting to your workbench pegboard is not just aesthetically pleasing, but it’s a functional design element that enhances visibility while working on projects. Task-focused lighting, such as strip or bar LED lights, works best for this approach.
Key Points:
- LED strip or bar lights offer ample illumination and energy efficiency.
- Prioritize placement over the workbench and in darker corners.
- Use clips or brackets that have adhesive backs to easily attach the lights to the pegboard.
- Consider adjustable lights for focusing on particular work areas.
- Incorporate smart lighting for easy control and variations in brightness.
Adopting this method illuminates your workspace, thus enhancing productivity and precision in your endless garage projects.
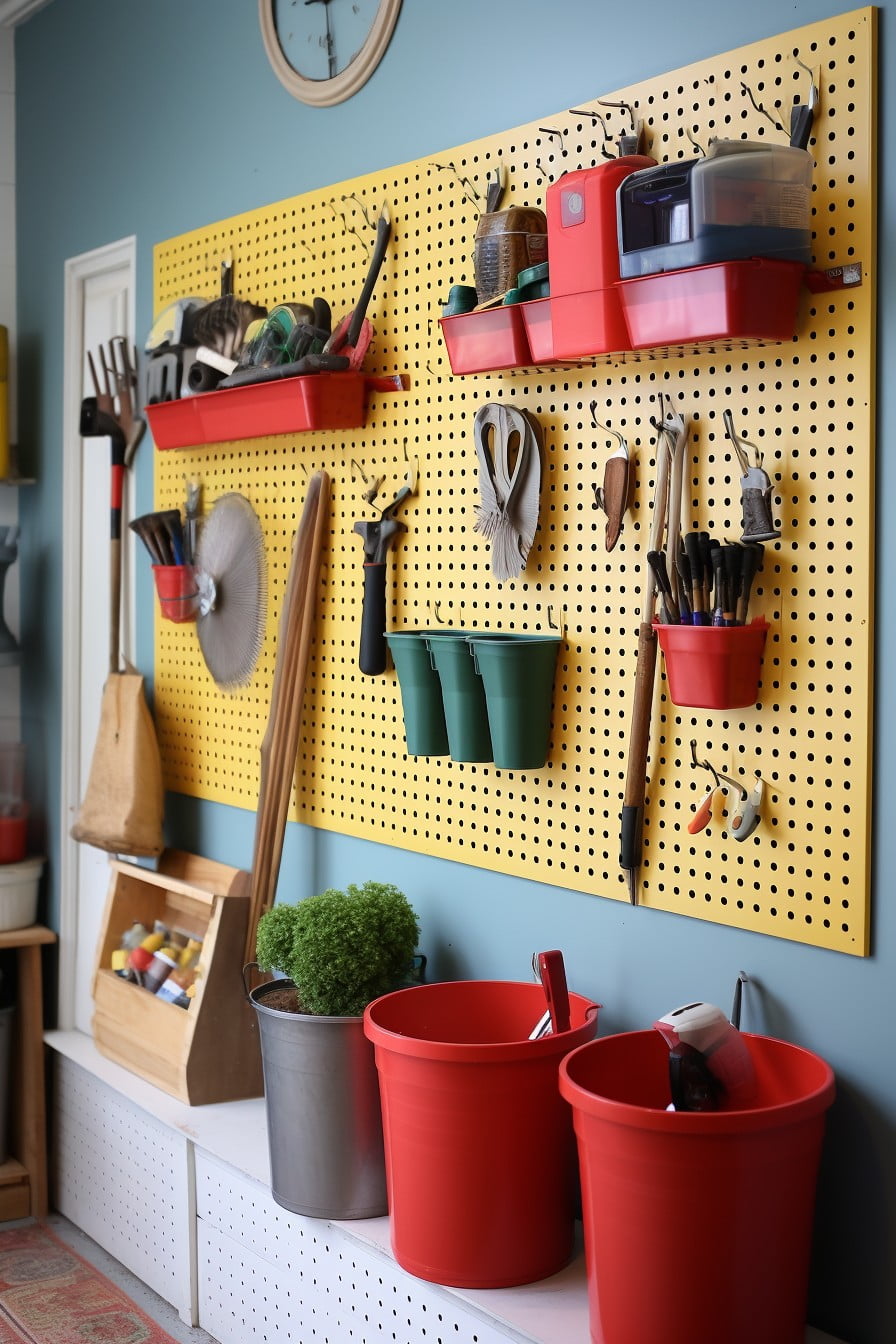
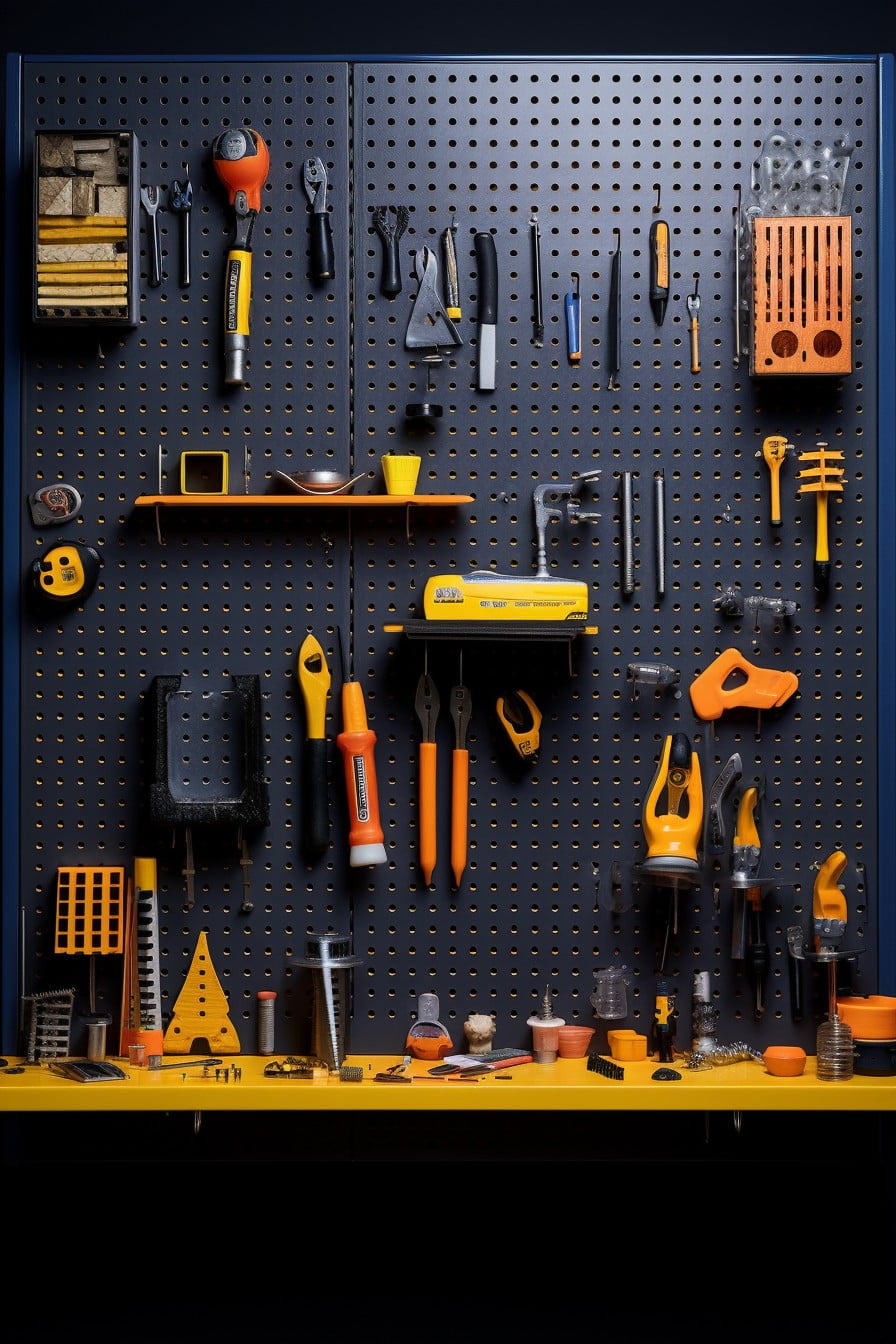
Painted Pegboard for Colorful Garage Organization

Adding a splash of color to your garage organization strategy can be a game-changer. A painted pegboard not only brightens up the space, but it can also play a role in categorization. Use different colors to compartmentalize tools depending on their utility, for example:
- Blue for mechanic tools: socket sets, wrenches, screwdrivers.
- Green for gardening tools: shears, trowels, watering cans.
- Red for power tools: drills, saws, sanders.
Choosing high-contrast colors against the tools’ hues ensures easy visibility. Protect the paint job and the panel by sealing the pegboard; this keeps it looking fresh and tidy. Opt for a semi-gloss or gloss finish; it reflects light better and provides an easy-to-clean surface.
Remember, organization isn’t solely about function—it’s about aesthetics too. A well-color-coded pegboard can serve as a beautiful centerpiece while keeping your garage orderly.
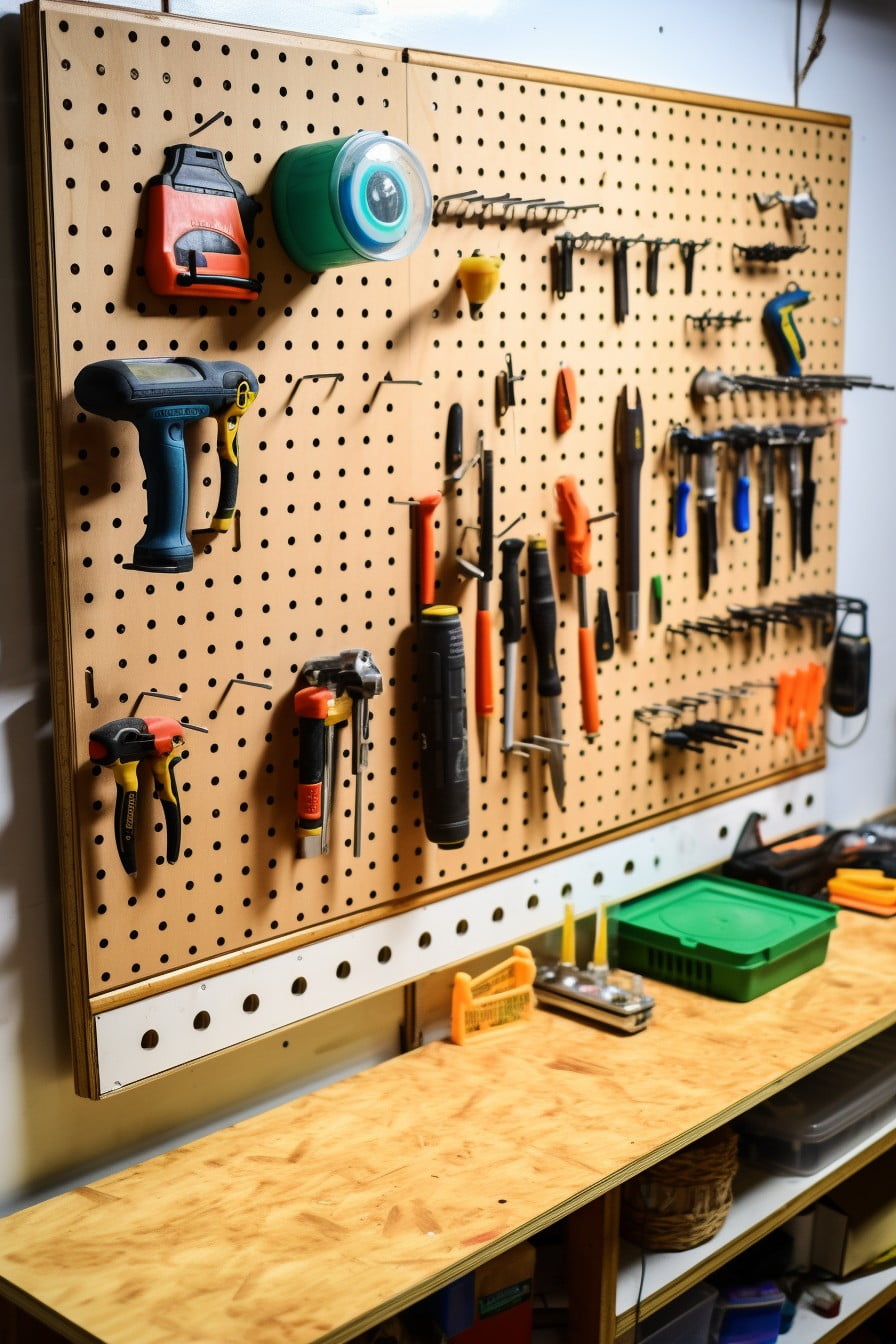
Pegboard Wall With Movable Hooks and Bins
Without a doubt, a key aspect of making the most out of a pegboard wall is the effective use of movable hooks and bins.
1. Flexibility: Adjustable hooks offer an element of versatility. Easily move or reposition them according to your changing storage needs.
2. Efficiency: Pegboard bins provide quick access and visibility to small items. This reduces time spent searching for those small parts typically lost in drawers.
3. Space Maximization: By hanging tools vertically, pegboards free up counter space. When combined with hooks and bins, even more space becomes available.
4. Organization: With pegboard bins, categorization becomes straightforward. Allocate each bin a specific type of item to avoid clutter and streamline your setup.
5. Visual Appeal: Aesthetically, a well-arranged pegboard wall is pleasing. Customize the layout to fit your personal style and create a workspace that encourages productivity.
Therefore, integration of movable hooks and bins into pegboard is an efficient solution to garage organization problems, providing a dynamic and organized space.
Outline Tools On Pegboard for Easy Return
To implement this idea, choose your most commonly used tools and arrange them on the pegboard. Use a permanent marker or colorful paint to trace around each tool. These outlines serve several helpful purposes:
- Identification: At a glance, you can easily spot the tools you need for a task.
- Accessibility: Utilizing a designated spot avoids disorderly tool piles.
- Efficiency: The visual cues speed up clean-up and prevent misplacement.
- Space Maximization: By grouping similar tools, you can optimize your spacing.
Remember, it’s not just about creating a system, it’s about keeping the system in order. Regular upkeep, suggested weekly depending on usage frequency, ensures every tool goes back to its traced spot.
Bear in mind accessibility according to task frequency. Place often-used tools at eye-level and lesser-used ones lower or higher. The customizability of pegboard means you can adjust your settings as your needs change.
Use Pegboard Inside Garage Cabinets
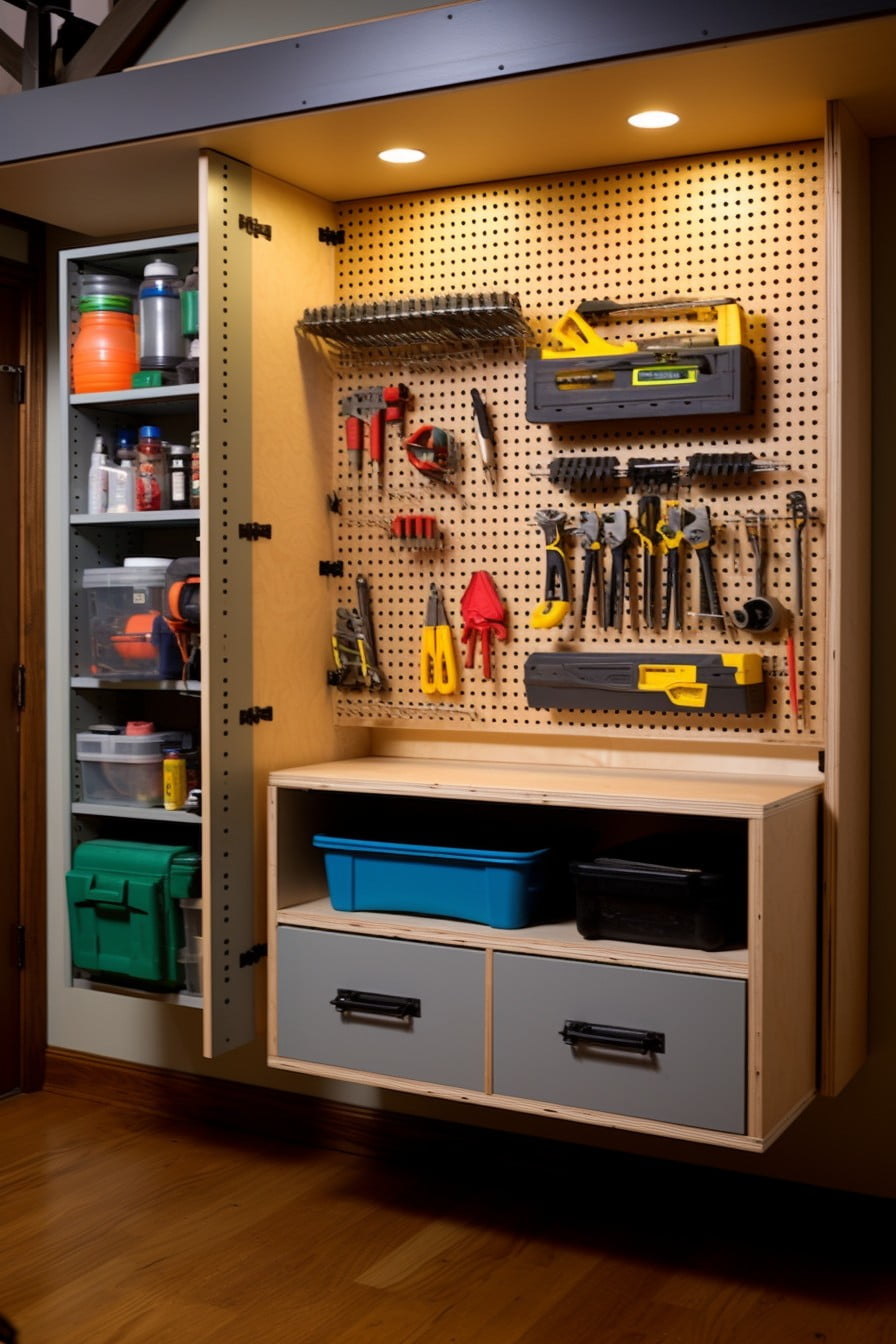
Leveraging the interior of your garage cabinets with a pegboard setup can boost your storage potential. It’s effective for organizing smaller tools or items that get lost easily, like drill bits, mini paint cans or small hand tools.
Key Points:
- Determine the cabinet size: You need to know how much pegboard to purchase. Measure the cabinet’s interior, both height and width.
- Choose the right pegs and hooks: Depending on what you plan to hang, choose suitable pegs and hooks that can hold the respective weight.
- Install the pegboard: Cut it to fit into the cabinet interior. Use spacers and screws to fix it to ensure stability.
- Organize your items: Start placing your tools on the board. Consider frequency of use when deciding on placement.
The incorporation of a pegboard inside garage cabinets allows for a neat environment, giving each tool or item its designated spot, and making your life just a bit simpler.
Overhead Pegboard Storage for Lesser-used Items
Making use of overhead space in the garage for pegboard storage provides a brilliant solution for items that are not frequently used, without compromising on accessibility. Consider putting up a sturdy pegboard on the garage ceiling, perfect for decluttering the floor and workbenches.
Here are some key points:
- 1. Measure and Install: Measure the ceiling area to decide on the size of the pegboard. Consider a professional installation if the area is large.
- 2. Identify Items: Determine which tools or equipment are used less frequently. These are perfect candidates for overhead storage.
- 3. Arrange Accordingly: Place heavier items closest to the edges for safe reach and stability. Lighter items can go towards the middle.
- 4. Use Suitable Hooks: Opt for heavy-duty hooks and holders to ensure the items stay secured.
- 5. Accessibility: Although overhead, make sure items are not too high to reach. Keep a step stool or ladder handy. Remember, safety should be paramount.
Optimizing your garage’s overhead space with pegboard storage can transform your space into a sleek, tidy workstation. Not only does it give every item a ‘home’, but it also promotes better organization and productivity in the long run.
Pegboard With Built-in Shelves
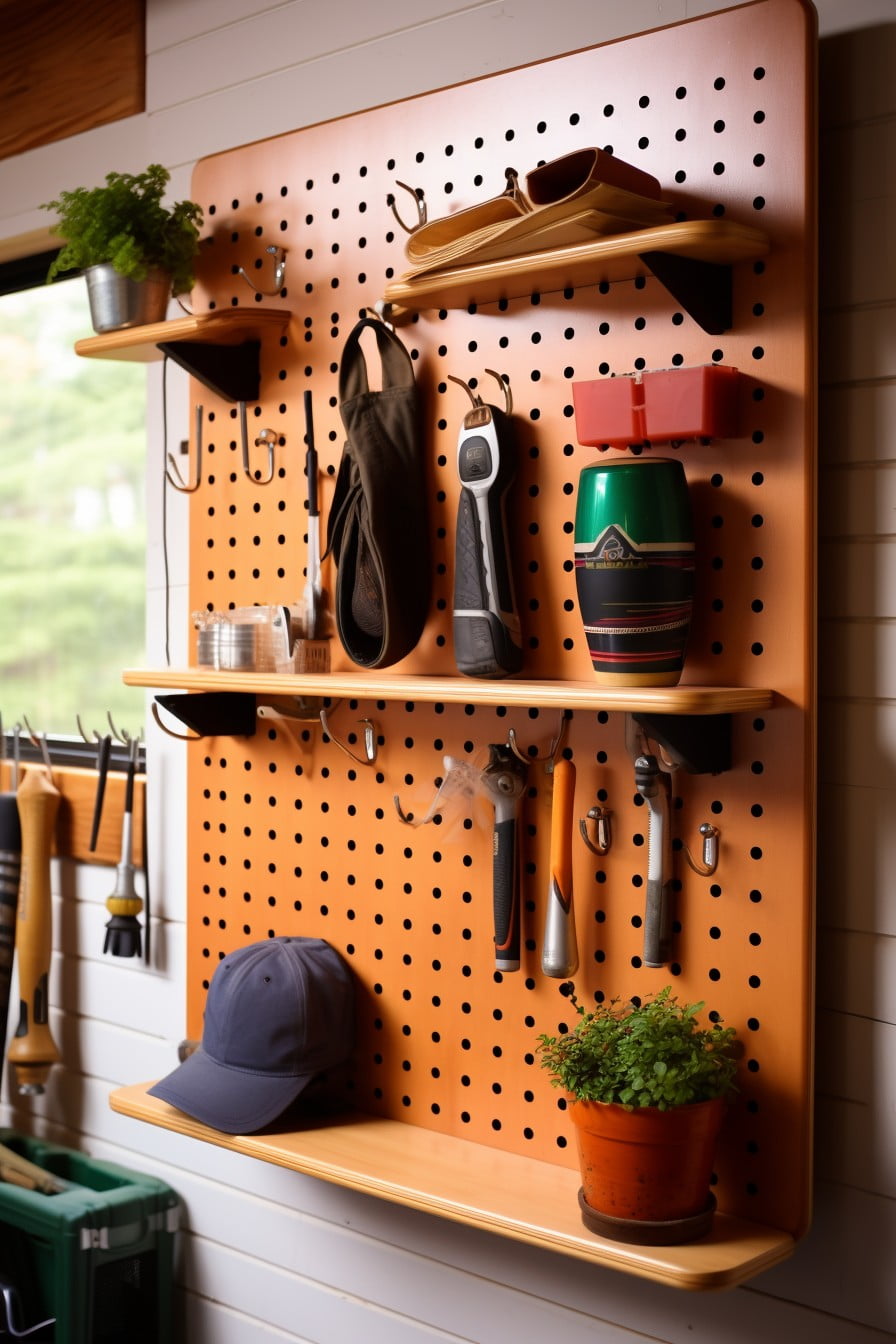
An upgrade to your traditional pegboard setup, integrating built-in shelves can offer additional space for larger tools or equipment. Here’s how it adds value to your garage organization:
1. Versatility: Unlike fixed shelves or racks, you can adjust these based on your specific needs. Need a wider shelf for a bulky tool? No problem!
2. Space Optimization: They save your floor space by stacking items vertically. You can use them for storing containers or heavy tools that may not hang well.
3. Accessibility: Items stored on these shelves are easily visible and reachable. No need to dig through drawers or cabinets.
4. Durability: Shelves made from high-quality materials provide sturdy storage. They withstand heavier weight than hooks alone.
Remember, while setting up, distribute weight evenly across the pegboard to maintain stability. Keep safety your priority, especially when dealing with heavy tools.
Sporting Equipment Dedicated Pegboard
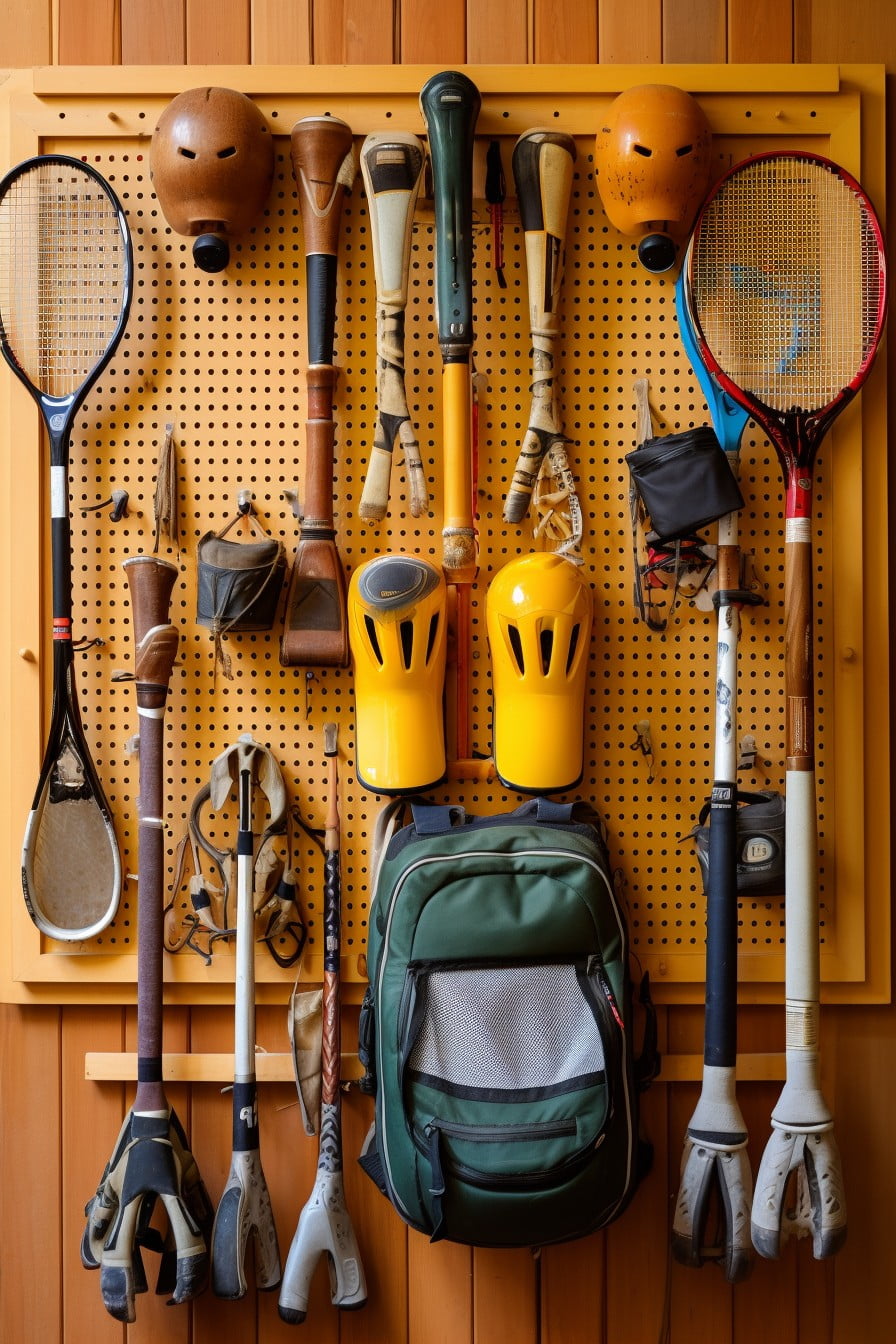
Transitioning from general purpose pegboards, a more sports-specific framework proves invaluable, especially for athletic homeowners. Appropriate positioning of hooks and bins can create a dedicated space for sporting equipment like tennis rackets, basketballs, or skating gear.
Key Points:
- Extra-large hooks: Ideal for hanging bicycles or hockey sticks.
- Mesh Baskets: Perfect for storing balls, helmets, or gloves.
- Multi-tool Holders: These can accommodate golf clubs, racquets, or cricket bats.
- Smaller hooks: Use these to hang skipping ropes, resistance bands, or yoga mats.
- Shelf attachments: Convenient for smaller items or accessories like protective gear or water bottles.
By employing a sports-focused pegboard organization, one can achieve an easily accessible, clutter-free garage that simplifies on-the-go transitions to sports activities.
Gardening Tool Pegboard Arrangement

Organizing your gardening tools on a pegboard not only makes your garage look tidy but also extends the life of these instruments by preventing damage. Here’s how to effectively arrange them:
1. Place Larger Tools in the Center: Start with shovels, rakes, and pruning shears. Their prominent positioning will make them easy to grab when needed.
2. Hang Smaller Tools on the Side: Trowels, hand pruners, and gloves can be comfortably stored around the outsides, leaving more room for larger items in the middle.
3. Group Similar Tools Together: Keep all the pots in one place, seeds packet in another. This system will make it simpler to locate items.
4. Utilize Hooks and Bins: Hooks are perfect for hanging items with handles, while bins can hold gloves, plant ties, or seed packets.
5. Label Each Area: This will ensure everyone knows where to return the tools after their use.
This arrangement technique guarantees ease of use, good tool care, efficient space utilization, and an aesthetically pleasing garage space.
Corner Pegboard for Maximizing Space
To make the most of garage corners where space is often underused, a corner pegboard setup is an excellent solution. With the right operational tactics, a corner pegboard can double storage and create an efficient tool organization system. Here’s how to implement it:
1. Choose the right pegboard materials: Durable materials such as metal or hard plastic are ideal for longevity.
2. Select appropriate hooks and holders: Consider the tools you’ll be storing. Pegboard hooks come in various shapes and sizes to accommodate different tools.
3. Plan your layout: Tools frequently used should be at eye level and within arm’s reach.
4. Use labels: To keep things organized, clear labels can direct you to the right tools quickly. It saves time and keeps the area neat.
Remember, the great benefit of this setup is its flexibility. A corner pegboard allows you to rearrange tools as needs evolve, a boon for any garage enthusiast.
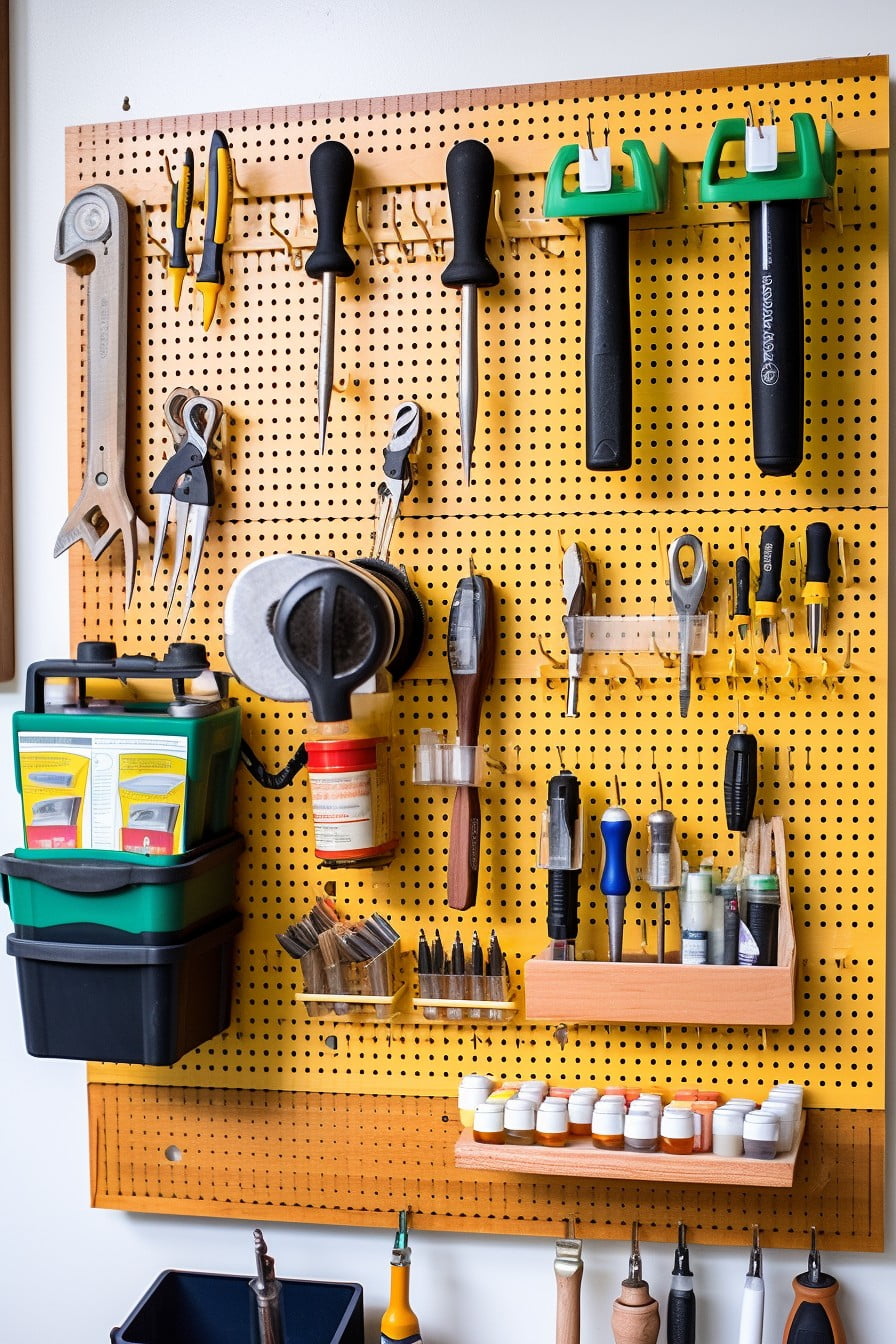
Pegboard With a Parts Organizer Tray
Attaching a parts organizer tray to your pegboard offers an exceptionally efficient way to sort and store smaller items like nails, screws, washers, and other small hardware. This simple addition can dramatically improve the convenience and functionality of your pegboard.
Key points to consider when implementing this option include:
- Size Considerations: Ensure the tray is small enough to fit, yet large enough to accommodate various parts.
- Placement: Position the tray within easy reach but not where it obstructs larger tools.
- Secure Attachment: Use strong hooks or brackets to securely attach the tray and prevent any risk of falls.
- Visible Labels: Clearly categorize sections for ease of access and return.
Magnetic Pegboard for Metal Tools
Ideal for holding metal tools, magnetic pegboards introduce a sleek and functional design element to your garage. They offer the advantages of traditional pegboards, while eliminating the need for hooks or bins. Metal tools stick directly to the surface of the board, allowing for easy organization and accessibility.
Key Points:
- Magnetic Strength: Ensure the magnet is strong enough to hold heavyweight tools, optimizing the functionality.
- Tool Identification: Magnetic pegboards can be customized with images or labels below each tool for better identification.
- Flexibility: The possibility to rearrange tools as needed, according to the size and frequency of usage.
- Added features: Some magnetic boards come equipped with tool holders, side hooks, or shelves for additional storage.
- Cleaning: Due to their smooth surface, magnetic pegboards are relatively easy to clean and are resistant to common garage debris.
Incorporating a magnetic pegboard within your garage not only forms a systematic place for your tools, but also delivers an industrial aesthetic appeal.
Car Maintenance Themed Pegboard
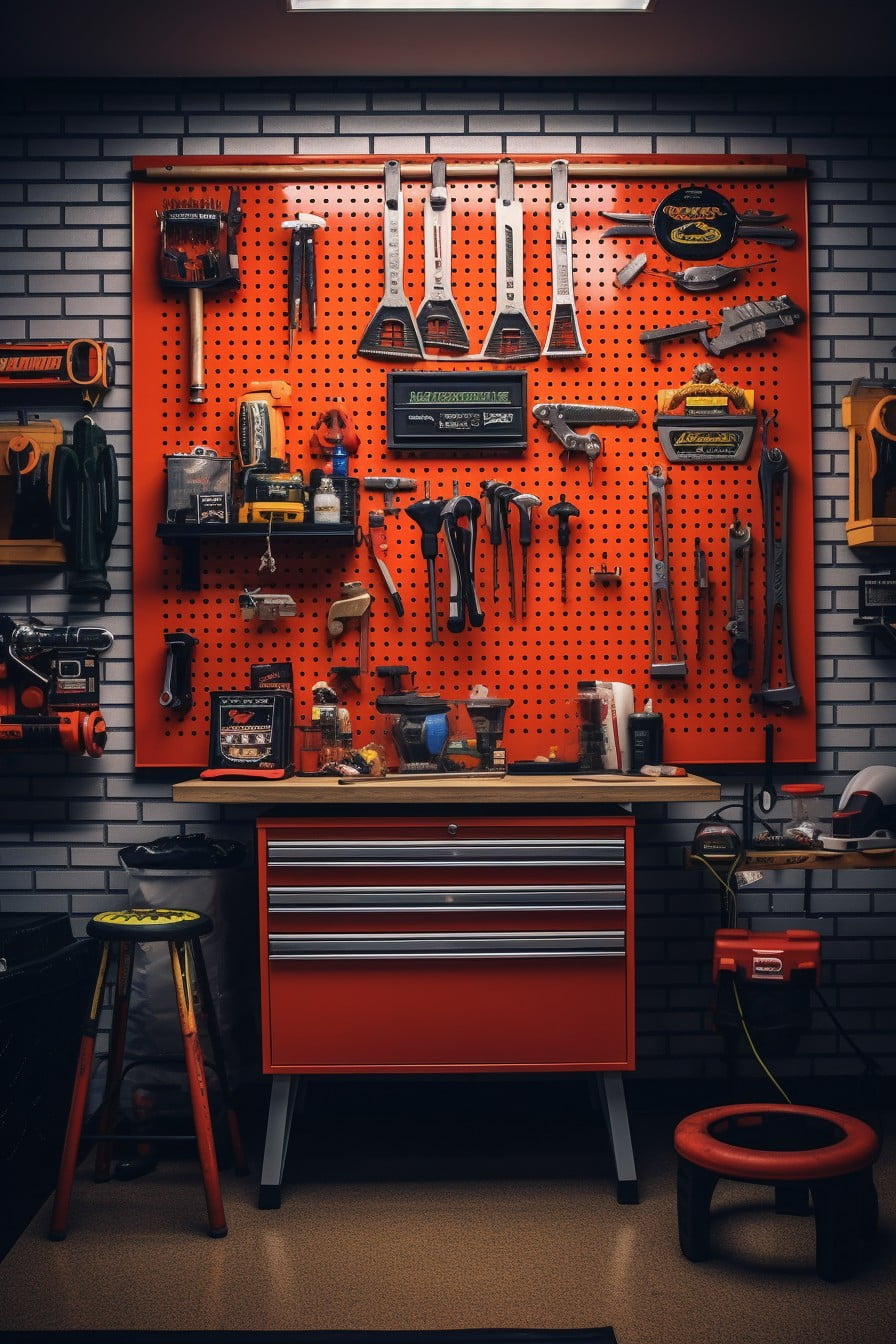
Organizing car maintenance tools on your pegboard can transform your garage into a handy car repair shop. It’s all about identifying common tools used and arranging them accordingly.
1. Start with basic tools – wrenches, pliers, multimeters, and screwdrivers. Group them together for easy selectivity during maintenance sessions.
2. Next, keep larger items like jacks, oil cans, and battery chargers close, but not obstructing working space.
3. Place small parts like fuses, nuts, and bolts in small bins.
4. Keep personal protective equipment nearby for safety.
5. Label each tool location, serving as a guide for replacement after use.
The optimum organization will save time otherwise lost searching for the right tool during your maintenance projects. Just a glance at your pegboard should communicate everything you need to know about your car maintenance gear.
Double-sided Pegboard for More Storage
A double-sided pegboard provides a practical, space-saving solution for garages. Capitalizing on both sides doubles the storage capacity, making it suitable for small or cramped spaces. This ingeniously designed resting panel can swivel around a central axis, enabling easy access to tools on either side.
Key points to remember:
- Offers double storage space in the same footprint.
- Easy to access: Swivels around, achieving maximum accessibility.
- Ideal for smaller garages to maximize storage capacity.
- Can accommodate a variety of tools due to the customizable nature of a pegboard.
- Ease of assembly and disassembly: Perfect for people who frequently reorganize their tools.
- Versatility and adaptability: With movable hooks and shelves, redesigning the layout is effortless.
- Aesthetic appeal: With proper arrangement, it can be visually appealing, creating an organized visual in the garage area.
Being efficient and versatile, double-sided pegboard storage enhances the functionality of your garage while maintaining a tidy atmosphere. This innovative solution empowers you to optimize your workspace and facilitates improved productivity.
Pegboard With Labeled Hooks for Tool Organization
Implementing labeled hooks can streamline the organization and accessibility of tools. This method enhances productivity by saving time that might otherwise be spent searching for a specific item.
Consider these steps:
- 1. Select Tools: Identify frequently utilized tools.
- 2. Acquire labels: Procure simple label makers or stickers.
- 3. Positioning: Arrange the tools as desired.
- 4. Apply labels: Write the tool’s name, apply the sticker to the corresponding hook.
- 5. Reposition as Needed: The flexibility of labels permits adjusting the layout based on use-patterns.
This systematic labeling enables easy identification and replacement of tools, ensuring an organized workspace and increased efficiency.
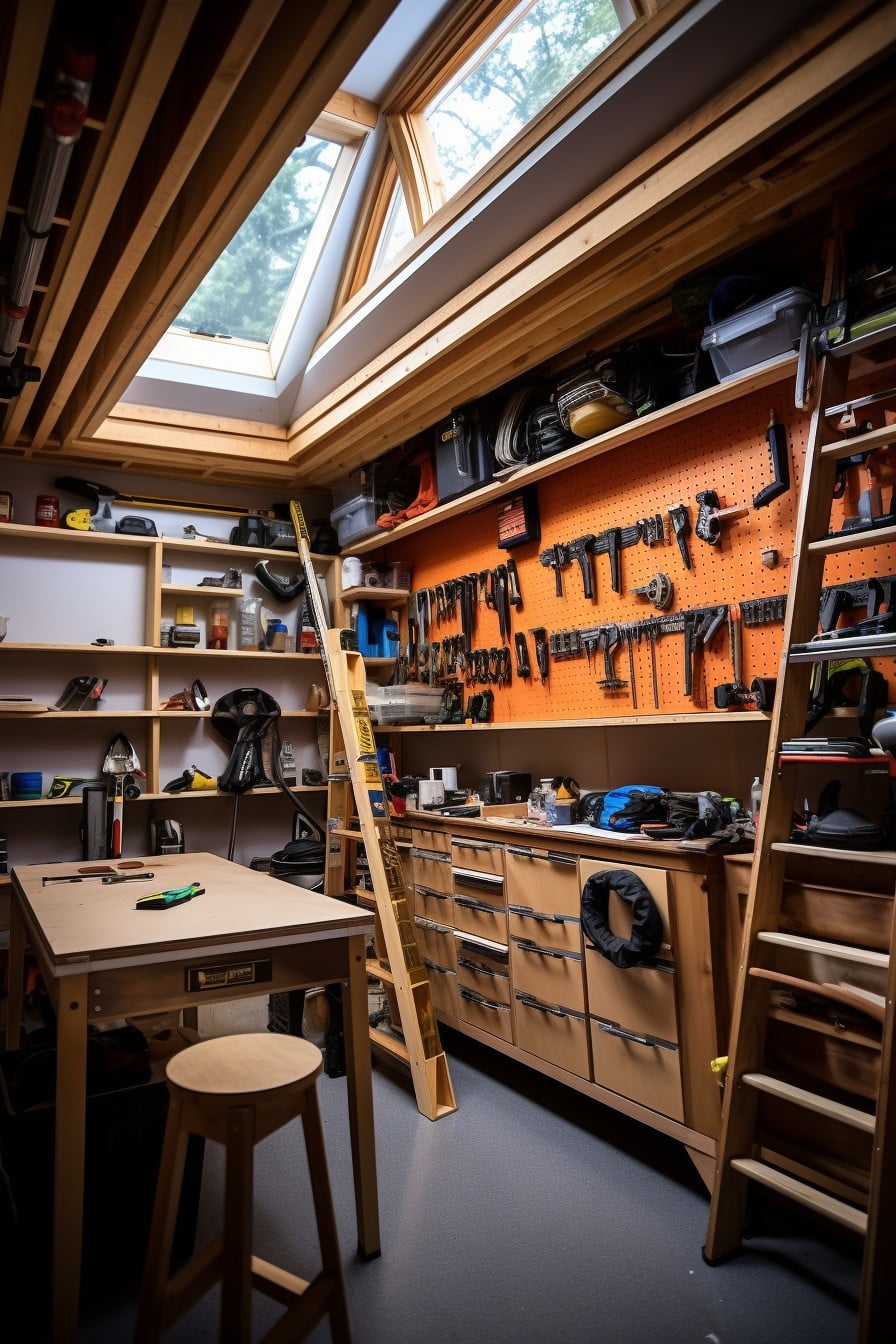
DIY Station With Woodworking Tools On a Pegboard
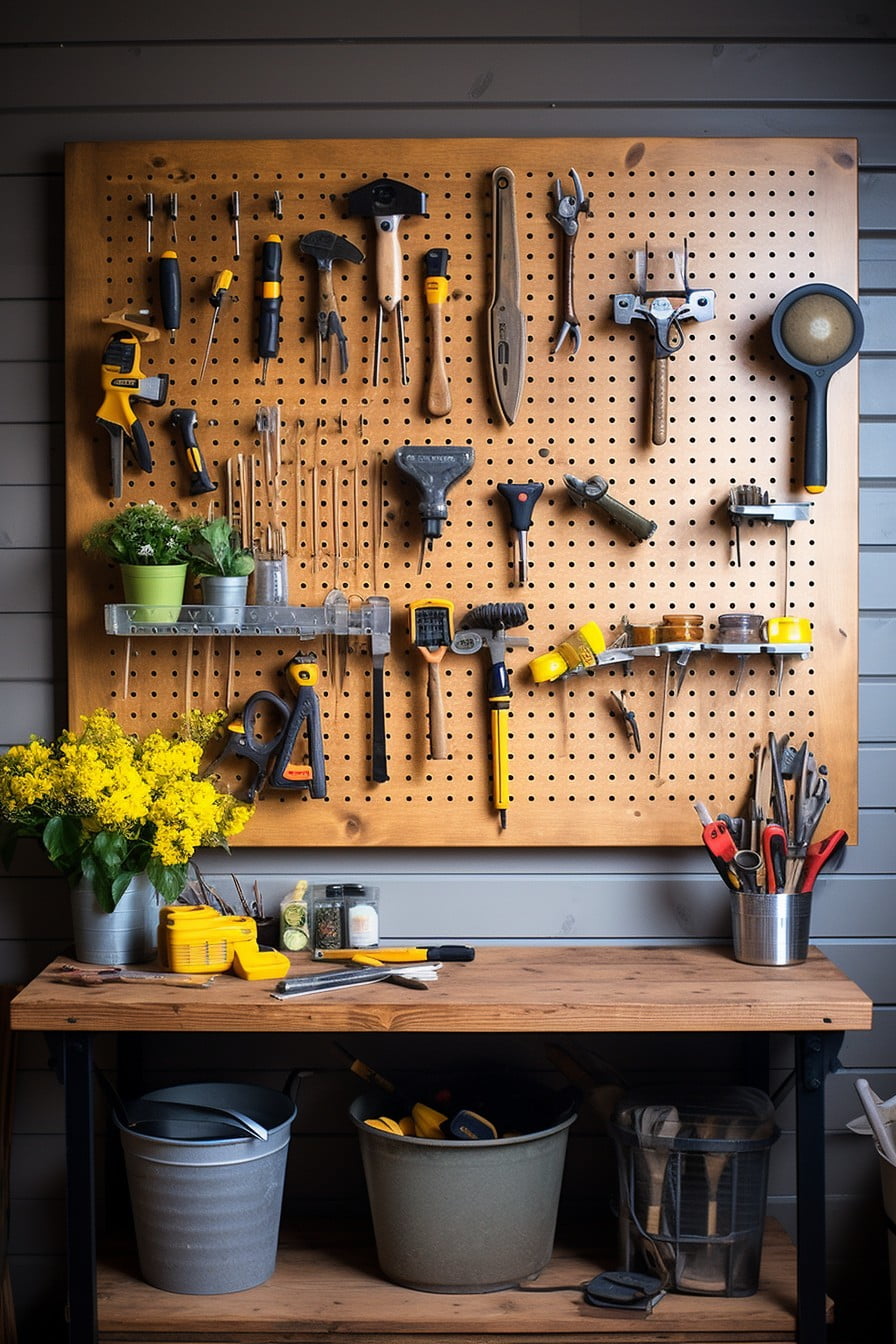
Marking a dedicated space for all your woodworking tools provides efficiency and sleekness to your workspace. Utilizing a pegboard in your designated DIY station helps keep all items in sight and within reach.
1. Tool Layout: Lay out your tools on the pegboard based on how frequently they’re used. The most regularly used tools should be kept at eye level for easy accessibility.
2. Spacing: Ensure there is adequate distance between each tool. This not only allows every tool to be easily located but also prevents them from colliding during removal or replacement.
3. Labeling: Labels are essential for larger pegboards. They help in easy identification and replacement of tools, even by those unfamiliar with the space.
4. Secure Installation: Use secure hooks or clips specifically designed for heavier tools to prevent them from falling off the board.
5. Lighting: Consider adding a task light above the pegboard. It guarantees clear visibility even when working late into the night.
6. Theming: Group similar tools together on the pegboard for a more organized overview and easier access.
Remember, the beauty of a pegboard is its convenience and flexibility, allowing you to constantly switch up arrangement as need or preference changes.
Bike Repair Area With Pegboard Storage
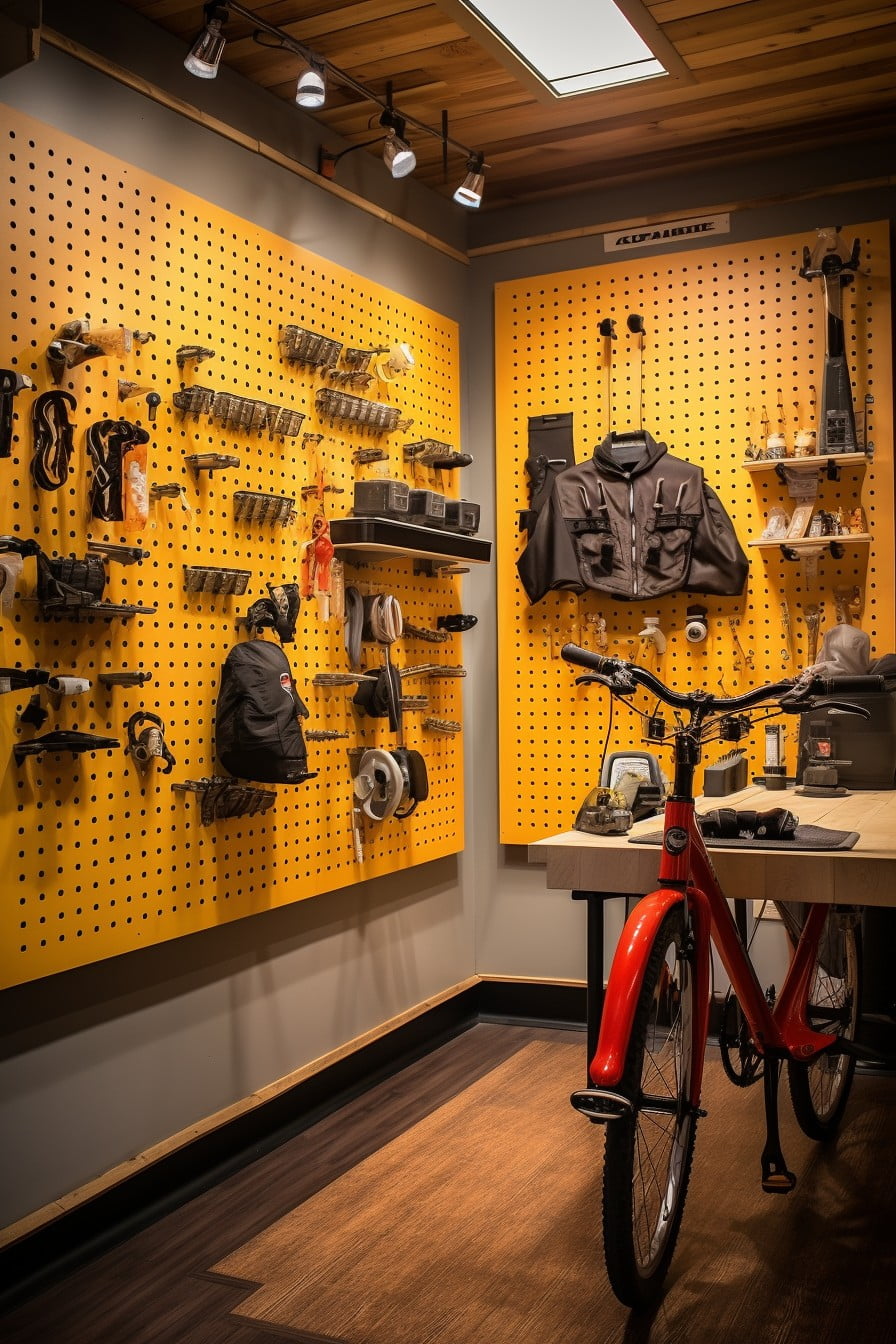
Implementing pegboard storage in a bike repair area can bring remarkable efficiency while doing routine maintenance or repair work. Pedestal your wrenches, pliers, screwdrivers, and other smaller tools in one designated spot for easy, clear access. Designing a spot to hang spare parts and bike attachments reduces the chance of misplacement.
Key points:
- Rank essential tools for accessibility. Daily use tools should hang within arm’s reach, while lesser-used tools occupy the outskirts.
- Inscribe ‘shadow outlines’ around tools to indicate their specific spots and encourage a clean return after use.
- Use varying hook sizes to accommodate tools of all dimensions. Use smaller hooks for lightweight, smaller tools while larger hooks can stabilize heavier equipment.
- Integrate a small parts organizer to securely store screws, nail, and bike parts. This prevents them from getting lost and keeps the workspace orderly.
- Implement adjustable shelves for larger items like helmets or bike shoes to have them nearby when needed.
Remember, a well-curated tool board not only keeps your space tidy but also saves precious repair time. As an added bonus, it might turn a previously daunting task into an enjoyable one.
Pegboard Storage for Screws and Nails
Harnessing the versatility of pegboards provides the perfect storage solution for screws and nails, notorious for their tendency to clutter workspaces. Here are some key points to consider:
1. Organizing Hardware: Use clear plastic containers or small magnetic bins attached to pegboard hooks for storing these fasteners. Label them according to size and type for easy identification and retrieval.
2. Pegboard Material: Opt for a metal pegboard that can utilize magnetic properties, thereby ensuring stronger hold for containers storing screws and nails.
3. Accessibility: Place this specific section at eye level or lower, enabling an effortless grab-and-go process.
4. Spacing: Ensure containers are spaced adequately so that they can be easily unplugged from the board and returned.
5. Safety: Keep sharp options like nails out of reach from children by placing them at a height or in containers with secure lids.
By implementing these suggestions, maintaining an organized and efficient workspace becomes a feasible task, increasing productivity in your garage projects and reducing the time spent searching for that elusive nail or screw.
Multilevel Pegboard for Larger and Smaller Tools
The strategic use of a multilevel pegboard offers an optimized solution for storing both large and small tools. Diversifying the levels of hooks and shelves can accommodate varying tool sizes and shapes, thereby utilizing garage space more effectively.
Key points to remember:
- Customizable Hook Levels: Adjusting pegboard hooks to different heights accommodates long-handled tools and short gadgets alike.
- Access and Visibility: Higher levels house less frequently used tools, while lower levels provide easy access for everyday items.
- Shelves for Bigger Tools: Incorporate shelves into your pegboard design for larger tools, which may not hang securely on hooks.
- Safety Measures: Ensure to fasten the pegboard firmly to the wall to avoid accidents with heavier instruments.
- Use of Dividers: Partition dedicated areas for specific tool categories, increasing organization.
By incorporating these tips, a multilevel pegboard can meet a diverse range of garage storage needs.
Related
 15 Ideas Vintage Ford Bronco Enthusiasts Will Love
 15 Vintage Mustang Restoration Ideas to Inspire Your Next Project
 Classic Ford Bronco Buying Guide: Tips for Choosing Your Vintage Ride
 15 Ideas for Enjoying the Pittsburgh Vintage Grand Prix
 Classic Cars for Sale Minnesota: Your Buying Guide to Vintage Vehicles